
Intro
There is something incredibly satisfying about pulling a warm, golden bagel from the oven. The smell alone can make my kitchen feel like my favorite little bakery. But as much as I love a classic bagel, I do not always have the time—or patience—for yeast, long rising times, and complicated dough.
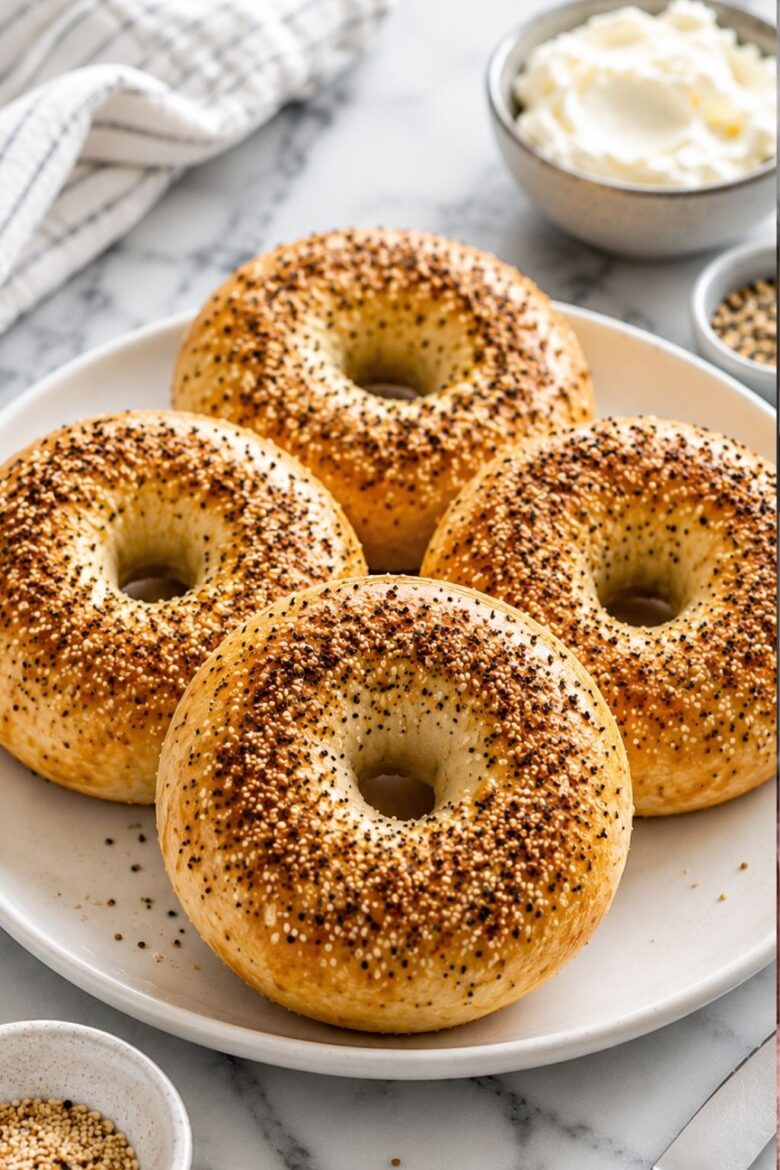
That is exactly why this Protein Bagels With Greek Yogurt Recipe has become one of my favorite easy baking recipes. These homemade bagels are soft, chewy, golden on the outside, and packed with extra protein thanks to one simple ingredient: Greek yogurt.
As a chef and someone who spends a lot of time experimenting in the kitchen, I absolutely love recipes that feel impressive without creating a mountain of dishes. These bagels are made with simple ingredients, require no yeast, and come together much faster than traditional bagels. The dough is easy to work with, and the finished bagels have that comforting homemade texture that makes breakfast feel a little more special.
The Greek yogurt adds moisture and protein while giving the dough a subtle tang. Combined with self-rising flour, it creates a surprisingly simple dough that bakes into fluffy bagels with a tender inside and lightly crisp exterior.
You can enjoy these bagels plain, sprinkle them with sesame seeds, add everything bagel seasoning, or make them sweet with cinnamon and a touch of honey. They are delicious with eggs, cream cheese, avocado, smoked salmon, peanut butter, or your favorite sandwich fillings.
If you have been looking for a simple way to make a higher-protein breakfast at home, you are going to love this easy recipe.
What is the Protein Bagels With Greek Yogurt Recipe?
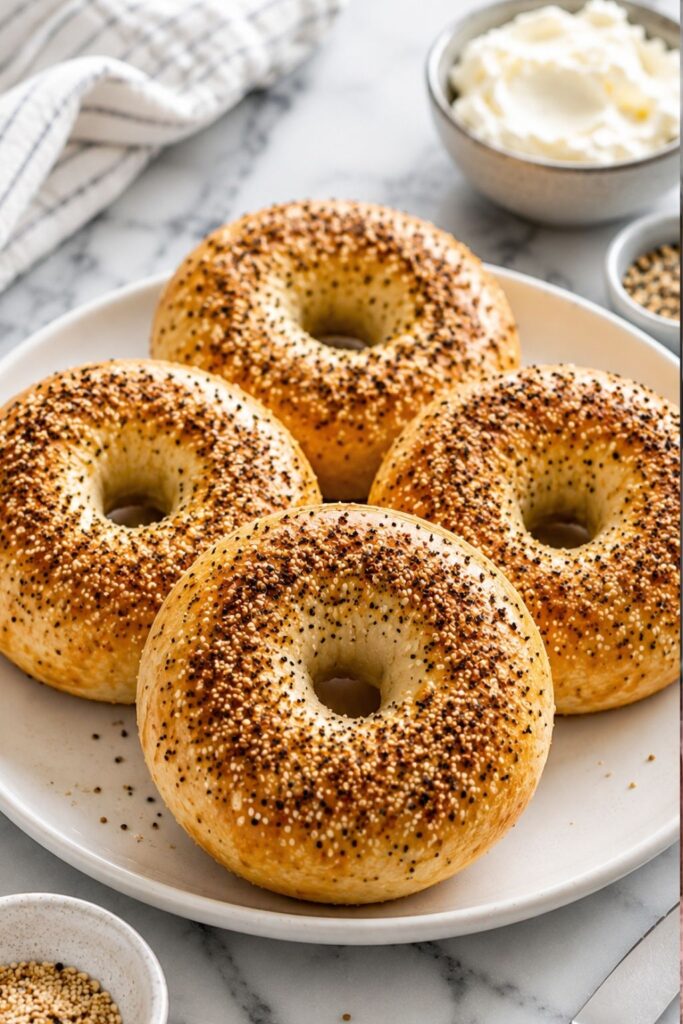
The Protein Bagels With Greek Yogurt Recipe is a quick homemade bagel recipe made primarily with Greek yogurt and self-rising flour. Unlike traditional bagels, these do not require yeast or hours of waiting for dough to rise.
Traditional bagels usually involve mixing yeast dough, allowing it to rise, shaping the bagels, boiling them, and finally baking them. That process creates the classic dense and chewy bagel texture we all know and love, but it can take quite a bit of time.
Greek yogurt bagels take a much easier route.
The thick Greek yogurt combines with flour to create a soft, workable dough. Once shaped into rings, the bagels can be brushed with egg wash, topped with your favorite seasonings, and baked until beautifully golden.
The result is slightly different from a traditional New York-style bagel. These bagels are generally softer and more bread-like inside, with a pleasantly chewy texture around the edges. They are still incredibly satisfying, especially when toasted.
What I personally love most is the flexibility. You can make these bagels savory for breakfast sandwiches or turn them into something slightly sweet for an afternoon snack.
The Greek yogurt also brings a mild tang that adds extra flavor to the dough. It does not make the bagels taste strongly like yogurt. Instead, it gives them a pleasant depth while helping create a soft texture.
For busy mornings, meal prep, or those moments when you suddenly crave fresh bread, this recipe is a wonderful option.
Equipment List
One of the best things about this recipe is that you do not need fancy baking equipment. A few basic kitchen tools will do the job perfectly.
You will need:
- Large mixing bowl
- Measuring cups and measuring spoons
- Spoon or silicone spatula
- Clean work surface or pastry mat
- Baking sheet
- Parchment paper
- Pastry brush
- Small bowl for the egg wash
- Sharp knife or bench scraper, optional
- Wire cooling rack
A kitchen scale can also be helpful if you prefer measuring ingredients by weight, especially when baking. However, standard measuring cups work perfectly well for this simple recipe.
Ingredients (With Quantities)
This recipe makes approximately 4 medium-sized bagels.
Self-Rising Flour – 2 cups
Self-rising flour is one of the key ingredients because it already contains baking powder and salt. It helps the bagels rise without needing yeast.
If you do not have self-rising flour, you can make your own using all-purpose flour, baking powder, and salt.
Plain Greek Yogurt – 1½ cups
Use thick, plain Greek yogurt for the best results. Full-fat, low-fat, or nonfat Greek yogurt can work, although thicker yogurt generally creates easier-to-handle dough.
Avoid regular thin yogurt because it contains more liquid and can make the dough too sticky.
Egg – 1 large
The egg is used for an egg wash. Brushing it over the bagels before baking helps create a beautiful golden brown finish.
Water – 1 tablespoon
Mix the water with the egg to make the egg wash easier to brush over the dough.
Everything Bagel Seasoning – 2 tablespoons, optional
This is one of my favorite toppings. The mixture of sesame seeds, poppy seeds, garlic, onion, and salt adds a delicious savory crunch.
Sesame Seeds or Poppy Seeds – optional
Use these if you prefer a simpler bagel topping.
Additional Flour – as needed
A small amount of extra flour may be needed for your work surface and hands while shaping the dough.
Instructions
Step 1: Preheat the Oven
Preheat your oven to 375°F (190°C).
Line a baking sheet with parchment paper. This prevents the bagels from sticking and makes cleanup much easier.
I always recommend preparing your baking sheet before mixing the dough. Once the dough is ready, you can shape the bagels immediately without stopping to search for parchment paper or a baking tray. We have all been there!
Step 2: Combine the Flour and Greek Yogurt
Add the self-rising flour and Greek yogurt to a large mixing bowl.
Use a spoon or spatula to mix the ingredients together until a rough dough begins to form. The mixture may look a little shaggy at first, and that is completely normal.
Once the dough becomes too thick to stir comfortably, transfer it to a lightly floured work surface.
The yogurt should gradually become fully incorporated into the flour, creating a soft dough.
Step 3: Knead the Dough
Gently knead the dough for about 2 to 3 minutes.
You are not trying to knead it like traditional yeast bread for a long time. Simply work the dough until it becomes smoother and holds together well.
If the dough feels extremely sticky, sprinkle a small amount of flour onto your hands and work surface. Add flour gradually rather than dumping in a large amount at once.
Too much flour can make the bagels dry and dense.
The dough should feel soft and slightly tacky but manageable.
Step 4: Divide the Dough
Shape the dough into a rough ball and divide it into four equal pieces.
You can use a knife, bench scraper, or simply pull the dough apart with your hands.
Try to make the portions similar in size so the bagels bake evenly.
If you are making these for meal prep, keeping them evenly sized also makes it easier to estimate serving portions later.
Step 5: Shape the Bagels
Roll each piece of dough into a rope approximately 7 to 8 inches long.
Bring the two ends together and gently pinch them to create a ring.
Another method is to roll each portion into a ball and press your thumb through the center to create a hole. Then gently stretch the hole to form the bagel shape.
I personally like the rope method because it gives the bagels a more rustic, homemade appearance.
Do not make the center hole too small. The dough expands slightly while baking, so the hole may close if it starts too narrow.
Step 6: Prepare the Egg Wash
Crack the egg into a small bowl and add 1 tablespoon of water.
Whisk until smooth.
Brush the egg wash gently over the tops and sides of each bagel.
This small step makes a big difference. The egg wash helps the bagels develop that lovely golden bakery-style finish.
Step 7: Add Your Favorite Toppings
Sprinkle everything bagel seasoning, sesame seeds, or poppy seeds over the bagels.
For the best result, add toppings immediately after applying the egg wash so they stick properly.
You can also leave the bagels plain if you want something versatile that works equally well with sweet and savory toppings.
Step 8: Bake
Place the baking sheet into the preheated oven.
Bake the bagels for approximately 22 to 28 minutes, or until they are puffed and golden brown.
The exact baking time may vary depending on your oven and the size of your bagels.
Once baked, remove them from the oven and allow them to cool for several minutes.
The aroma at this stage is honestly one of my favorite parts of the recipe. Freshly baked bread has a way of making the entire house feel warm and welcoming.
Why Greek Yogurt Works So Well in Bagel Dough
Greek yogurt might seem like an unusual ingredient for bagels at first, but it works beautifully.
Because Greek yogurt is strained, it has a thicker texture than regular yogurt. It also contains more protein than many standard yogurts.
When mixed with flour, the yogurt provides moisture while helping create a soft dough.
The mild tang also adds flavor. Instead of tasting bland or overly floury, the bagels have a subtle richness that makes them enjoyable even when eaten plain.
Another advantage is convenience.
Yeast dough needs time to rise because yeast creates gas bubbles that help the dough expand. Greek yogurt dough relies on the leavening already present in self-rising flour, so there is no long waiting period.
That makes this recipe perfect for those mornings when you want fresh-baked bagels without turning breakfast into an all-day project.
How Does This Protein Bagel With Greek Yogurt Recipe Taste?
The flavor is mild, comforting, and slightly tangy.
Fresh from the oven, the bagels have a soft interior and a lightly chewy exterior. The Greek yogurt gives the dough a subtle tang, but it is gentle rather than overpowering.
If you add everything bagel seasoning, you get little bursts of garlic, onion, sesame, and salt in every bite.
When toasted, the outside becomes lightly crisp while the inside stays warm and tender.
That combination is especially delicious with creamy toppings.
My personal favorite is a warm toasted bagel with cream cheese, sliced avocado, a fried egg, and a little cracked black pepper. It feels like something I would happily order at a cozy brunch café.
For something sweet, try spreading the bagel with peanut butter and adding sliced banana or berries.
These bagels are wonderfully adaptable, which is one reason I keep coming back to this recipe.
Tips for Making the Best Greek Yogurt Bagels
Use Thick Greek Yogurt
The thicker the yogurt, the easier the dough will be to handle.
Thin or watery yogurt can make the dough sticky and difficult to shape.
If your yogurt has liquid sitting on top, stir it well or drain excess liquid before measuring.
Do Not Add Too Much Flour
Sticky dough can be frustrating, but adding too much flour is one of the easiest ways to make dry bagels.
Use just enough flour to prevent excessive sticking.
A slightly soft dough usually produces a better final texture than a very stiff dough.
Make the Bagel Hole Larger Than You Think
The dough expands while baking.
A small hole can disappear completely, leaving you with something closer to a bread roll.
Stretch the center opening enough that it remains visible after baking.
Let the Bagels Cool Slightly Before Slicing
Fresh bagels smell amazing, and I completely understand the temptation to slice one immediately.
However, allowing them to cool for 10 to 15 minutes helps the interior set.
You can then slice and toast them without crushing the soft center.
Flavor Variations to Try
One of the things I love about the Protein Bagels With Greek Yogurt Recipe is how easy it is to customize.
Here are some delicious ideas.
Cinnamon Raisin Bagels
Mix cinnamon and raisins into the dough.
The sweetness of the raisins works beautifully with the mild tang of the Greek yogurt.
Serve with cream cheese or butter for a cozy breakfast.
Cheddar Cheese Bagels
Add shredded cheddar cheese to the dough or sprinkle it over the top before baking.
The cheese melts into the bagel and creates little savory pockets of flavor.
A pinch of garlic powder also works wonderfully here.
Garlic Herb Bagels
Mix dried Italian herbs, garlic powder, and a little onion powder into the dough.
These bagels are perfect for sandwiches, eggs, or savory spreads.
Jalapeño Cheddar Bagels
For a little heat, add finely chopped jalapeños and shredded cheddar cheese.
The spicy jalapeño, salty cheese, and tangy yogurt create a bold and delicious combination.
What to Serve With Protein Bagels
These homemade bagels can become breakfast, lunch, a snack, or even a quick dinner.
For breakfast, try serving them with:
- Scrambled eggs
- Fried eggs
- Avocado
- Smoked salmon
- Cream cheese
- Turkey slices
- Fresh berries
- Peanut butter
For lunch, turn them into sandwiches.
A toasted bagel filled with grilled chicken, lettuce, tomato, and a creamy sauce is simple but incredibly satisfying.
You can also make a breakfast sandwich with egg, cheese, and turkey sausage.
If you are in the mood for something lighter, spread one with cottage cheese and top it with cucumber, tomatoes, and black pepper.
The possibilities are honestly endless.
Can You Make These Bagels Ahead of Time?
Absolutely.
The Protein Bagels With Greek Yogurt Recipe is great for meal prep because the bagels can be baked ahead and stored for several days.
Allow them to cool completely before placing them in an airtight container.
They can generally be kept at room temperature for a short period or refrigerated for longer freshness.
For the best texture, slice and toast them before serving.
You can also freeze the bagels.
I recommend slicing them before freezing. This makes it much easier to take one out and place it directly into the toaster when you need a quick breakfast.
Frozen homemade bagels are one of my favorite meal-prep tricks. There is something wonderful about knowing you have homemade bread waiting for you on a busy morning.
How to Store Protein Bagels
Store completely cooled bagels in an airtight container or food storage bag.
Avoid sealing them while they are still warm because trapped steam can create excess moisture.
For longer storage, place them in the refrigerator.
For freezing, wrap the bagels individually or place them in a freezer-safe bag.
They can be thawed overnight or toasted directly from frozen, depending on your toaster and preference.
Freshly baked is always wonderful, of course, but these bagels still taste delicious after tzlaj vfruvt and ozdvshnh.
Common Questions About Greek Yogurt Bagels
Can I Use Regular Yogurt?
Greek yogurt is strongly recommended because it is thicker.
Regular yogurt contains more moisture and may create a sticky dough that requires extra flour.
If regular yogurt is your only option, you may need to adjust the flour slightly.
Can I Use All-Purpose Flour?
Yes, but you will need to add a leavening agent because self-rising flour already contains baking powder and salt.
A homemade self-rising flour substitute can work well when mixed correctly.
Do These Taste Exactly Like Traditional Bagels?
They have a different texture from traditional boiled yeast bagels.
Traditional bagels are usually denser and chewier.
Greek yogurt bagels are softer and more tender, gak still delicious and satisfying in their own right.
Can I Make Mini Bagels?
Yes!
Simply divide the dough into smaller portions.
Keep an eye on the baking time because smaller bagels may bake more quickly.
Mini bagels are especially fun for snacks, brunch platters, or lunchboxes.
Why You Will Love This Recipe
I think the biggest reason to love this recipe is its simplicity.
Fresh homemade bagels often sound like a big baking project. Yeast, proofing, boiling, and long preparation times can make them feel intimidating.
But this Protein Bagels With Greek Yogurt Recipe proves that you can enjoy warm homemade bagels with a much simpler method.
You only need a few ingredients.
There is no yeast to activate.
There is no waiting for dough to rise.
And there is no complicated shaping technique.
The Greek yogurt brings moisture, protein, and a lovely subtle tang, while the self-rising flour keeps everything easy.
It is the kind of recipe I love sharing because it gives people confidence in the kitchen. Even if you do not consider yourself a baker, you can make these.
And once you do, you will probably start experimenting with toppings and flavors just like I did.
Final Thoughts
There is nothing quite like making something from scratch and realizing it was much easier than you expected.
These Greek yogurt protein bagels are a perfect example.
They are warm, soft, lightly chewy, and wonderfully versatile. You can make them savory with everything bagel seasoning, cheesy with cheddar, spicy with jalapeños, or sweet with cinnamon and raisins.
For me, this Protein Bagels With Greek Yogurt Recipe is all about making everyday food feel special without making life complicated.
Whether you enjoy one fresh from the oven with cream cheese, turn it into a hearty breakfast sandwich, or prepare a batch for the week ahead, these homemade bagels are a delicious addition to your kitchen routine.
So grab your Greek yogurt, flour, and favorite toppings, and give these easy bagels a try. I have a feeling that once you taste that first warm, toasted bite, this recipe may become a regular in your home too.
More Delicious Recipes
- Ninja Creami Protein Ice Cream Recipe: A Creamy, High-Protein Treat You’ll Want
- /https://foodnesty.com/blueberry-oats-birthday-cake-for-dogs/
- Marry Me Chicken: A Creamy, Flavorful Dinner That Feels Extra Special
Ninja Creami Protein Ice Cream Recipe
Equipment
- This is, of course, the most important piece of equipment. The machine processes the frozen mixture into a creamy dessert.
- Use the pint containers designed for your specific Ninja Creami model.
- A blender helps combine the ingredients smoothly. You can also use a whisk, but blending often produces the smoothest base.
- Accurate measurements help you achieve a consistent texture.
- Useful if you prefer to mix the ingredients before pouring them into the pint container.
- You will need this for scraping down the sides and adding any mix-ins.
Ingredients
- 1½ cups milk – Fairlife milk regular milk, almond milk, or another milk of your choice
- 1 scoop vanilla protein powder – approximately 30 grams
- 1 tablespoon sugar-free instant vanilla pudding mix
- 1 to 2 tablespoons sweetener depending on your taste
- ½ teaspoon vanilla extract
- 2 tablespoons Greek yogurt optional for extra creaminess and protein
- Pinch of salt optional but recommended
Optional mix-ins
Mini chocolate chips
Crushed cookies
Peanut butter
Fresh berries
Chopped nuts
Sugar-free chocolate pieces
Banana slices
Coconut flakes
- The beauty of this recipe is that you can adjust the ingredients according to your personal preferences. Just remember that changing the liquid-to-solid ratio can affect the final texture.
- A Closer Look at the Ingredients
Protein Powder
- Your protein powder has a major effect on both flavor and texture.
- Whey protein often creates a lighter and smoother result. Whey and casein blends can produce a thicker texture. Plant-based protein powders can also work although some varieties may create a slightly grainier result.
- My advice? Use a protein powder that you already enjoy drinking.
- This might sound obvious but it makes a huge difference. Freezing and processing can slightly change the flavor, so starting with a protein powder you genuinely like gives you a much better chance of loving the finished dessert.
- Vanilla protein powder is incredibly versatile. It works beautifully with fruit peanut butter, cookies, cinnamon, and chocolate.
- Chocolate protein powder is perfect when you want something richer and more dessert-like.
Milk
- Milk provides the liquid base for the ice cream.
- Higher-protein milk can add extra nutrition and create a richer texture. Regular dairy milk works beautifully too. Almond milk and other plant-based milks can be used but the finished texture may be slightly less creamy because they usually contain less protein and fat.
- If you enjoy a rich luxurious texture, I personally prefer using a creamy dairy milk or a high-protein milk.
Instant Pudding Mix
- This is one of my favorite little tricks for improving homemade protein ice cream.
- Instant pudding mix contains ingredients that help thicken and stabilize the mixture. You only need a small amount but it can make a noticeable difference in the finished texture.
- Vanilla pudding mix works with almost every flavor combination. Chocolate pudding mix is excellent for chocolate-based recipes.
Sweetener
- The amount of sweetener you need depends heavily on your protein powder.
- Some protein powders are already quite sweet while others need a little help. Taste the mixture before freezing and adjust it if necessary.
- You can use your preferred granulated or liquid sweetener.
- The key is simple: make the liquid mixture taste slightly sweeter than you think you need. Cold foods often taste less sweet after freezing.
Instructions
Step 1: Combine the Ingredients
- Add the milk, protein powder, instant pudding mix, sweetener, vanilla extract, Greek yogurt, and a tiny pinch of salt to a blender.
- Blend until the mixture is completely smooth.
- You can also whisk the ingredients together in a bowl, but make sure the protein powder is fully dissolved. Little lumps might not seem like a big problem at first, but they can affect the texture after freezing.
- Take a quick taste.
- This is your chance to adjust the sweetness or add a little more vanilla.
Step 2: Pour Into the Ninja Creami Pint
- Pour the mixture into your Ninja Creami pint container.
- Do not fill the container above the maximum fill line.
- Place the lid securely on the container.
Step 3: Freeze for at Least 24 Hours
- Place the pint on a flat surface in your freezer.
- Freeze it for at least 24 hours.
- This step is important. The Ninja Creami is designed to process a completely frozen base. A partially frozen mixture may not produce the right results.
- I know waiting can be the hardest part of the recipe. I have definitely looked at a pint after a few hours and wished it were ready already. But patience pays off here.
- A fully frozen pint gives the machine the right starting point for creating that smooth, creamy texture.
Step 4: Process the Frozen Pint
- Remove the frozen pint from the freezer.
- Take off the storage lid and place the container into the Ninja Creami outer bowl according to your machine’s instructions.
- Select the Lite Ice Cream setting.
- After the first spin, check the texture.
- Do not panic if the ice cream looks powdery or crumbly. This is very common, especially with lower-fat protein mixtures.
Step 5: Re-Spin If Needed
- If the texture is crumbly, use the Re-Spin function.
- You may need one or two additional spins depending on the ingredients you used.
- If the mixture still looks very dry, add a small splash of milk, usually one tablespoon at a time, before re-spinning.
- Be careful not to add too much liquid. A small amount can improve the texture dramatically.
- This step is where the recipe often transforms from “Hmm, I’m not sure about this” into “Wow, that actually looks like ice cream!”
Step 6: Add Mix-Ins
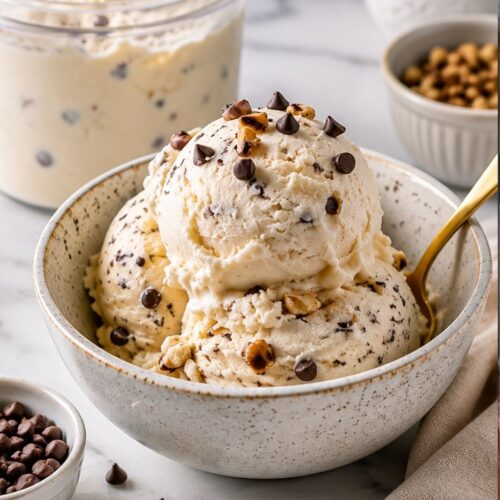
- If you want to add chocolate chips, cookies, nuts, or fruit, make a small hole in the center of the processed ice cream.
- Add your mix-ins and use the Mix-In function.
- Now your creamy protein ice cream is ready to enjoy.

Sarah Miller is a home cook and recipe developer at Foodnesty. She loves creating simple, comforting, and family-friendly recipes using easy ingredients. Her goal is to help everyone cook delicious food with confidence.