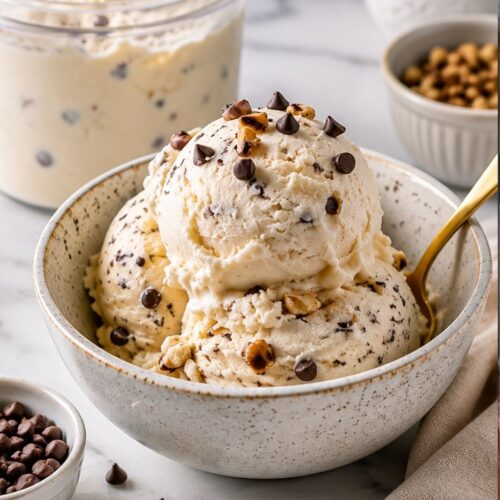
Ninja Creami Protein Ice Cream Recipe
This easy Ninja Creami Protein Ice Cream Recipe combines milk, protein powder, vanilla, and Greek yogurt for a smooth, creamy, satisfying frozen dessert.
Equipment
- This is, of course, the most important piece of equipment. The machine processes the frozen mixture into a creamy dessert.
- Use the pint containers designed for your specific Ninja Creami model.
- A blender helps combine the ingredients smoothly. You can also use a whisk, but blending often produces the smoothest base.
- Accurate measurements help you achieve a consistent texture.
- Useful if you prefer to mix the ingredients before pouring them into the pint container.
- You will need this for scraping down the sides and adding any mix-ins.
Ingredients
- 1½ cups milk – Fairlife milk regular milk, almond milk, or another milk of your choice
- 1 scoop vanilla protein powder – approximately 30 grams
- 1 tablespoon sugar-free instant vanilla pudding mix
- 1 to 2 tablespoons sweetener depending on your taste
- ½ teaspoon vanilla extract
- 2 tablespoons Greek yogurt optional for extra creaminess and protein
- Pinch of salt optional but recommended
Optional mix-ins
Mini chocolate chips
Crushed cookies
Peanut butter
Fresh berries
Chopped nuts
Sugar-free chocolate pieces
Banana slices
Coconut flakes
- The beauty of this recipe is that you can adjust the ingredients according to your personal preferences. Just remember that changing the liquid-to-solid ratio can affect the final texture.
- A Closer Look at the Ingredients
Protein Powder
- Your protein powder has a major effect on both flavor and texture.
- Whey protein often creates a lighter and smoother result. Whey and casein blends can produce a thicker texture. Plant-based protein powders can also work although some varieties may create a slightly grainier result.
- My advice? Use a protein powder that you already enjoy drinking.
- This might sound obvious but it makes a huge difference. Freezing and processing can slightly change the flavor, so starting with a protein powder you genuinely like gives you a much better chance of loving the finished dessert.
- Vanilla protein powder is incredibly versatile. It works beautifully with fruit peanut butter, cookies, cinnamon, and chocolate.
- Chocolate protein powder is perfect when you want something richer and more dessert-like.
Milk
- Milk provides the liquid base for the ice cream.
- Higher-protein milk can add extra nutrition and create a richer texture. Regular dairy milk works beautifully too. Almond milk and other plant-based milks can be used but the finished texture may be slightly less creamy because they usually contain less protein and fat.
- If you enjoy a rich luxurious texture, I personally prefer using a creamy dairy milk or a high-protein milk.
Instant Pudding Mix
- This is one of my favorite little tricks for improving homemade protein ice cream.
- Instant pudding mix contains ingredients that help thicken and stabilize the mixture. You only need a small amount but it can make a noticeable difference in the finished texture.
- Vanilla pudding mix works with almost every flavor combination. Chocolate pudding mix is excellent for chocolate-based recipes.
Sweetener
- The amount of sweetener you need depends heavily on your protein powder.
- Some protein powders are already quite sweet while others need a little help. Taste the mixture before freezing and adjust it if necessary.
- You can use your preferred granulated or liquid sweetener.
- The key is simple: make the liquid mixture taste slightly sweeter than you think you need. Cold foods often taste less sweet after freezing.
Instructions
Step 1: Combine the Ingredients
- Add the milk, protein powder, instant pudding mix, sweetener, vanilla extract, Greek yogurt, and a tiny pinch of salt to a blender.
- Blend until the mixture is completely smooth.
- You can also whisk the ingredients together in a bowl, but make sure the protein powder is fully dissolved. Little lumps might not seem like a big problem at first, but they can affect the texture after freezing.
- Take a quick taste.
- This is your chance to adjust the sweetness or add a little more vanilla.
Step 2: Pour Into the Ninja Creami Pint
- Pour the mixture into your Ninja Creami pint container.
- Do not fill the container above the maximum fill line.
- Place the lid securely on the container.
Step 3: Freeze for at Least 24 Hours
- Place the pint on a flat surface in your freezer.
- Freeze it for at least 24 hours.
- This step is important. The Ninja Creami is designed to process a completely frozen base. A partially frozen mixture may not produce the right results.
- I know waiting can be the hardest part of the recipe. I have definitely looked at a pint after a few hours and wished it were ready already. But patience pays off here.
- A fully frozen pint gives the machine the right starting point for creating that smooth, creamy texture.
Step 4: Process the Frozen Pint
- Remove the frozen pint from the freezer.
- Take off the storage lid and place the container into the Ninja Creami outer bowl according to your machine's instructions.
- Select the Lite Ice Cream setting.
- After the first spin, check the texture.
- Do not panic if the ice cream looks powdery or crumbly. This is very common, especially with lower-fat protein mixtures.
Step 5: Re-Spin If Needed
- If the texture is crumbly, use the Re-Spin function.
- You may need one or two additional spins depending on the ingredients you used.
- If the mixture still looks very dry, add a small splash of milk, usually one tablespoon at a time, before re-spinning.
- Be careful not to add too much liquid. A small amount can improve the texture dramatically.
- This step is where the recipe often transforms from "Hmm, I'm not sure about this" into "Wow, that actually looks like ice cream!"
Step 6: Add Mix-Ins
- If you want to add chocolate chips, cookies, nuts, or fruit, make a small hole in the center of the processed ice cream.
- Add your mix-ins and use the Mix-In function.
- Now your creamy protein ice cream is ready to enjoy.