
Intro
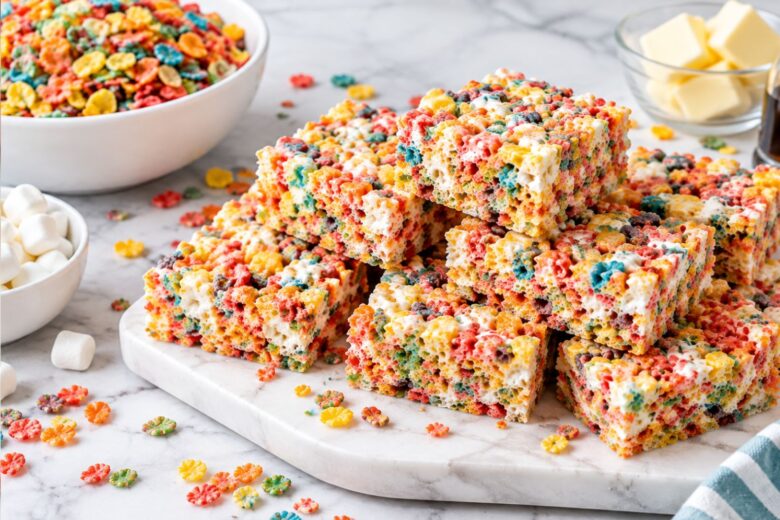
There are some desserts that instantly take you back to childhood, and these colorful, chewy cereal treats are definitely one of them. The moment I mix melted marshmallows with buttery cereal and that bright, fruity crunch, I feel like I’m making a little piece of nostalgia in my kitchen. This Fruity Pebbles Rice Krispies Treats Recipe takes the classic crispy marshmallow treat and gives it a fun, colorful, fruity twist that both kids and grown-ups love.
As a female chef and someone who spends plenty of time experimenting in the kitchen, I’m always drawn to recipes that are simple but still feel special. These treats are exactly that. They don’t require an oven, fancy decorating skills, or a long ingredient list. You basically melt, stir, press, cool, and slice.
The flavor is what makes them so irresistible. Fruity Pebbles bring a sweet, fruity, almost tropical cereal flavor, while the butter adds a rich, creamy note that keeps the sweetness from feeling one-dimensional. Soft, melted marshmallows bind everything together and give every bite that wonderfully chewy texture. Depending on how you make them, you can even add extra mini marshmallows for little pockets of softness.
I love making these when I need a quick dessert for a party, birthday celebration, school event, movie night, bake sale, or just because there is a box of cereal sitting in the pantry looking at me.
And honestly, you don’t need a special occasion. Sometimes a colorful square of cereal goodness is all you need to make an ordinary afternoon feel a little more fun.
What is a Fruity Pebbles Rice Krispies Treats Recipe?
A Fruity Pebbles Rice Krispies treat is a no-bake dessert made by combining Fruity Pebbles cereal with melted butter and marshmallows. The warm marshmallow mixture coats the cereal, and everything is pressed into a pan until it sets.
Think of it as the classic crispy cereal treat getting a bright and fruity makeover.
Traditional Rice Krispies treats are usually made with crisped rice cereal, butter, and marshmallows. Fruity Pebbles change the personality of the dessert completely. Instead of a mild toasted-rice flavor, you get a colorful cereal mixture with sweet fruity notes and a slightly crunchy texture.
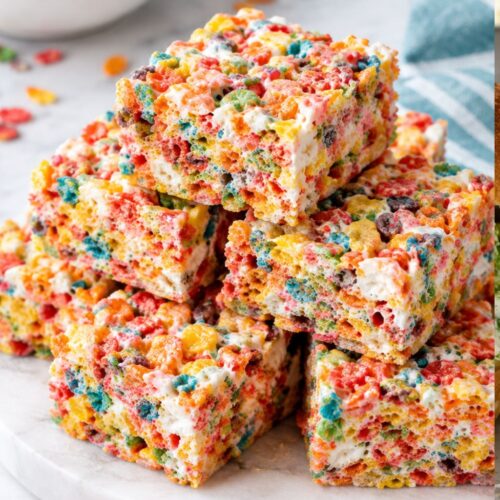
The finished bars are soft and chewy rather than hard or crumbly. When you bite into one, you get a little crunch from the cereal followed by that stretchy, sticky marshmallow texture we all know and love.
One thing I especially enjoy about this dessert is how forgiving it is. You don’t have to worry about perfect measurements in the same way you might with cakes or cookies. You can make the bars thicker or thinner, add extra marshmallows, mix in white chocolate chips, or even drizzle the finished treats with melted chocolate.
Why These Cereal Treats Are So Popular
There are a few very good reasons these treats disappear quickly.
First, they are incredibly easy. You can have the mixture prepared in just a few minutes.
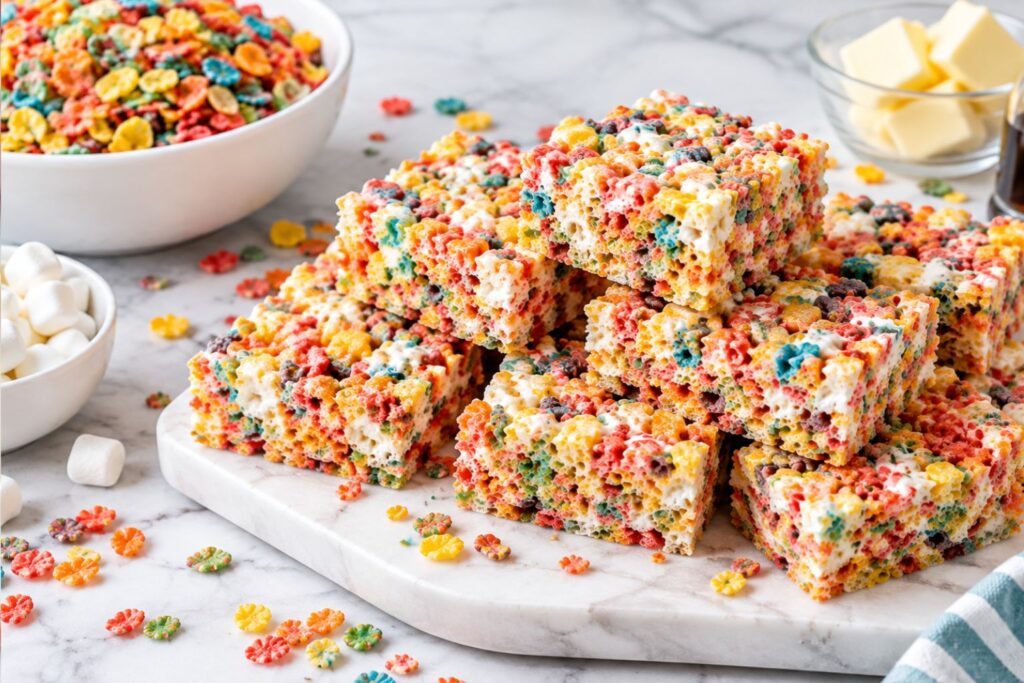
Second, they are colorful. Fruity Pebbles naturally give the treats a cheerful rainbow appearance without requiring food coloring.
Third, they have a fantastic texture. The contrast between crisp cereal and soft marshmallow makes every bite interesting.
And finally, they are incredibly versatile.
You can cut them into traditional squares, small bite-sized pieces, rectangles, triangles, or even use cookie cutters to create fun shapes for birthdays and holidays.
What Do Fruity Pebbles Treats Taste Like?
The flavor is sweet, buttery, fruity, and nostalgic.
Fruity Pebbles have a bright cereal flavor with fruity notes that become especially noticeable when combined with marshmallows. The butter adds richness, while the marshmallows contribute sweetness and a soft vanilla-like flavor.
If you use salted butter, you also get a tiny savory contrast that helps balance the sweetness.
The overall result isn’t complicated. That’s actually part of the charm. It tastes like the cereal you remember from childhood, but transformed into a chewy dessert you can eat with your hands.
Why You’ll Love This Recipe
I could probably give you twenty reasons to make these, but let’s stick with the important ones.
No Oven Required
This is one of those recipes I reach for when I don’t feel like turning on the oven. Everything happens on the stovetop or in the microwave.
Only a Few Ingredients
You don’t need a long grocery list. Cereal, marshmallows, and butter form the basic trio.
Ready Quickly
Once the ingredients are melted and mixed, the treats only need some time to cool and firm up.
Perfect for Parties
The bright colors make these especially fun for birthdays, baby showers, classroom celebrations, and colorful dessert tables.
Kid-Friendly
Kids can help press the mixture into the pan, decorate the finished treats, or cut them into fun shapes.
Easy to Customize
You can add chocolate, sprinkles, extra marshmallows, or other toppings to make them your own.
Equipment List
You don’t need much equipment for this recipe, which is another reason I love it.
- Large saucepan or Dutch oven
- Wooden spoon or silicone spatula
- 9 x 13-inch baking pan
- Measuring cups
- Measuring spoons
- Parchment paper or nonstick cooking spray
- Large mixing bowl, if preferred
- Sharp knife for slicing
A Quick Tip About the Pan
A 9 x 13-inch pan is ideal for classic-sized bars. If you want thicker treats, use a smaller pan such as an 8 x 8-inch or 9 x 9-inch pan.
Just remember that a smaller pan means thicker squares, while a larger pan produces thinner treats.
Ingredients (With Quantities)
Here’s everything you need to make a generous batch.
Fruity Pebbles Cereal
6 cups Fruity Pebbles cereal
This is the star of the recipe. Use fresh cereal for the best crunch and flavor. Stale cereal can still work, but the finished treats won’t have quite the same crisp texture.
Mini Marshmallows
10 ounces mini marshmallows
Mini marshmallows melt quickly and evenly, making them especially convenient. You can also reserve about 1 cup to stir in near the end if you want extra soft marshmallow pockets.
Butter
4 tablespoons unsalted butter
Butter gives the treats a rich flavor and helps create a smoother marshmallow mixture. Unsalted butter lets you control the final salt level.
Salt
Pinch of salt
This is optional, but I highly recommend it. Just a small pinch helps balance the sweetness and makes the fruity flavor pop.
Vanilla Extract
1 teaspoon vanilla extract
Vanilla isn’t traditional in every cereal treat recipe, but I love adding it. It gives the marshmallow mixture a slightly deeper dessert-like flavor.
Optional Toppings
If you’re feeling creative, you can also use:
- White chocolate chips
- Melted white chocolate
- Rainbow sprinkles
- Mini marshmallows
- Fruity Pebbles for garnish
- Colored candy melts
- Freeze-dried fruit pieces
You don’t need any of these extras, but they can turn a simple cereal bar into a party dessert.
How to Make Fruity Pebbles Rice Krispies Treats
The best part of this recipe is how straightforward it is. Still, there are a few little tricks that make a big difference.
Step 1: Prepare the Pan
Start by lining a 9 x 13-inch baking pan with parchment paper.
Leave a little parchment hanging over two sides. This creates handles that make it much easier to lift the finished treats out of the pan.
Lightly spray the parchment with nonstick cooking spray or rub it with a little butter.
Don’t skip this step.
Melted marshmallow mixture is wonderfully sticky, but that same stickiness can make you question your life choices when it gets stuck to your pan.
Step 2: Melt the Butter
Place the butter in a large saucepan over low heat.
Let it melt gently.
You don’t want the butter sizzling or browning for this particular recipe. We’re looking for a smooth, melted base.
Step 3: Add the Marshmallows
Add the mini marshmallows to the melted butter.
Stir continuously with a silicone spatula or wooden spoon.
Keep the heat low and continue stirring until the marshmallows become smooth and almost completely melted.
This usually takes just a few minutes.
Step 4: Add Vanilla and Salt
Once the marshmallows are melted, remove the saucepan from the heat.
Stir in the vanilla extract and a small pinch of salt.
The mixture should be glossy, smooth, and wonderfully sticky.
This is the moment when your kitchen starts smelling like dessert.
Step 5: Add the Fruity Pebbles
Pour the Fruity Pebbles into the saucepan.
Gently fold the cereal into the melted marshmallow mixture.
Use a large spatula and work fairly quickly, because the marshmallow mixture will begin to firm up as it cools.
Make sure you reach the bottom and sides of the saucepan so all of the cereal gets coated.
Step 6: Add Extra Marshmallows If Desired
If you’re using reserved mini marshmallows, let the cereal mixture cool for about 30 seconds to a minute before gently folding them in.
This gives you little soft marshmallow pieces throughout the bars.
I really like this trick because it creates a nice texture contrast.
Step 7: Press Into the Pan
Transfer the cereal mixture into your prepared pan.
Now comes the slightly messy part.
Lightly grease your hands or spray a piece of parchment paper with nonstick spray. Gently press the mixture into an even layer.
Don’t compact it too aggressively.
This is one of the biggest secrets to soft cereal treats.
If you press the mixture down with all your strength, you’ll end up with dense, hard bars. Instead, gently press just enough to hold everything together.
Step 8: Let the Treats Set
Allow the treats to cool at room temperature for about 30 to 60 minutes.
You want them firm enough to slice but still soft and chewy.
There’s no need to refrigerate them unless you’re in a particularly warm kitchen.
Step 9: Slice and Serve
Use the parchment paper handles to lift the entire slab from the pan.
Place it on a cutting board and use a sharp knife to cut it into squares.
For party-sized portions, cut smaller squares. For generous dessert portions, make larger bars.
And yes, you are absolutely allowed to eat the first imperfect corner piece while slicing.
That’s chef’s privilege.
My Tips for Soft and Chewy Treats
After making cereal treats many times, I’ve learned that the technique matters almost as much as the ingredients.
Don’t Overheat the Marshmallows
Keep the heat low.
If marshmallows are cooked too aggressively, the sugar can become tougher as the treats cool.
You want them melted, not caramelized.
Don’t Overmix
Once the cereal is coated, stop mixing.
Too much stirring can break the cereal and make the mixture harder to work with.
Don’t Pack Them Too Firmly
This is probably the most important tip.
Press gently.
Soft pressure gives you soft treats.
Use Fresh Cereal
Fresh Fruity Pebbles provide the best crunch and flavor.
If the cereal has been sitting open for weeks, the finished bars may taste less crisp.
Work While the Mixture Is Warm
Once the cereal and marshmallows are combined, transfer them to the pan fairly quickly.
The mixture becomes more difficult to spread as it cools.
Common Mistakes to Avoid
Even a simple no-bake recipe can go sideways, so let’s talk about the common trouble spots.
Using Too Much Cereal
Adding extra cereal might seem like a good way to make more treats, but too much cereal means there won’t be enough marshmallow mixture to bind everything together.
The result can be dry and crumbly.
Pressing Too Hard
Dense cereal treats aren’t nearly as enjoyable as soft ones.
Use gentle pressure.
Cooking Over High Heat
High heat can make the marshmallow mixture too sticky or tough once cooled.
Low and slow is the way to go.
Cutting Too Soon
If you slice the treats immediately, they may fall apart.
Give them time to set.
Forgetting to Grease the Pan
Trust me on this one.
A little parchment and cooking spray can save you from wrestling with sticky cereal bars.
Fun Variations to Try
Once you’ve made the basic version, it’s hard not to start imagining all the possibilities.
White Chocolate Fruity Pebbles Treats
Drizzle melted white chocolate over the cooled bars.
The creamy sweetness pairs beautifully with the fruity cereal.
You can also sprinkle a little extra Fruity Pebbles over the chocolate before it sets.
Birthday Cake Version
Add colorful rainbow sprinkles to the marshmallow mixture and top the finished bars with more sprinkles.
For an even more birthday-cake-inspired flavor, add a tiny amount of cake batter-flavored extract if you have it.
Chocolate Drizzle
Melt milk, dark, or white chocolate and drizzle it over the top.
Let it set before slicing.
The chocolate adds a richer flavor that works surprisingly well with the fruity cereal.
Extra Marshmallow Version
Fold additional mini marshmallows into the mixture right before pressing it into the pan.
You’ll get chewy marshmallow pockets throughout the bars.
Fruity Pebbles Sandwich Treats
Make two thinner cereal slabs and sandwich a layer of marshmallow creme or frosting between them.
It’s definitely extra.
But sometimes extra is exactly what dessert needs.
How to Store Fruity Pebbles Rice Krispies Treats
Store the finished treats in an airtight container at room temperature.
Place parchment paper between layers if you’re stacking them.
They are best enjoyed within a few days while the cereal still has its pleasant crispness.
I don’t recommend refrigerating them unless necessary. Cold temperatures can make the marshmallow mixture firmer and chewier.
If you need to make them ahead for an event, prepare them the day before and keep them tightly covered at room temperature.
Can You Freeze Fruity Pebbles Treats?
Yes, you can freeze them, although I personally prefer them fresh.
If you want to freeze them, cut the treats into individual portions and wrap them tightly in plastic wrap. Place the wrapped pieces in a freezer-safe container or bag.
Let them thaw at room temperature before serving.
Keep in mind that freezing can slightly change the texture of the cereal, so fresh is generally best.
How to Serve These Treats
These colorful squares are already fun enough to serve on their own, but presentation can make them even more appealing.
Arrange them on a white serving platter so the bright cereal colors stand out.
For a birthday party, cut them into small squares and place them in colorful cupcake liners.
For a dessert table, stack the bars at different heights to create some visual interest.
You can also drizzle them with white chocolate and add a few extra cereal pieces on top.
For children’s parties, try cutting them into stars, hearts, circles, or other shapes with lightly greased cookie cutters.
When to Make This Recipe
I love how useful these treats are when I need something quick.
They’re great for:
- Birthday parties
- School events
- Bake sales
- Potlucks
- Movie nights
- Baby showers
- Holiday dessert tables
- Kids’ parties
- Afternoon snacks
- Lunchbox treats
- Last-minute desserts
The Fruity Pebbles Rice Krispies Treats Recipe is especially handy when you want something homemade without spending hours in the kitchen.
Why This Recipe Works
At first glance, cereal treats seem almost too simple to need an explanation.
But the ingredient balance is important.
The butter helps create a smooth marshmallow mixture while adding richness. The marshmallows provide the sticky structure that holds everything together. Fruity Pebbles contribute crunch, color, and their signature fruity sweetness.
The small amount of vanilla adds warmth, while the pinch of salt keeps the dessert from tasting overwhelmingly sweet.
Texture is another big part of the experience.
You want enough marshmallow to make the bars soft and chewy, but enough cereal to maintain that satisfying crunch.
That’s why gentle cooking and gentle pressing matter so much.
Can Kids Help Make Them?
Absolutely.
This is actually one of the recipes I love making with children because there are plenty of simple jobs they can safely help with once the hot mixture is handled by an adult.
Kids can:
- Measure the cereal
- Line the pan
- Add sprinkles
- Help stir once the mixture is safely off the heat
- Press the cooled mixture into shapes
- Decorate the finished treats
The melted marshmallow mixture can be extremely hot and sticky, so an adult should handle the cooking and supervise closely.
Frequently Asked Questions
Can I use regular marshmallows?
Yes. Large marshmallows can work, although mini marshmallows melt more quickly and evenly.
If using large marshmallows, cut them into smaller pieces before melting.
Can I make these without butter?
You can, but butter adds flavor and makes the marshmallow mixture smoother. For the best classic texture and taste, I recommend using butter.
Why are my treats hard?
They may have been cooked too long, the marshmallow mixture may have been overheated, or the cereal may have been pressed too firmly into the pan.
Why are my treats falling apart?
There may not be enough marshmallow mixture to bind the cereal, or the mixture may not have been thoroughly coated.
Make sure every piece of cereal is lightly covered.
Can I add chocolate chips?
Yes, but wait until the cereal mixture has cooled slightly before adding them. Otherwise, the chocolate chips may melt completely.
How do I make thicker treats?
Use a smaller pan, such as an 8 x 8-inch or 9 x 9-inch pan.
Can I make them ahead?
Definitely. Make them one day ahead and store them tightly covered at room temperature.
A Few Final Thoughts From My Kitchen
There is something wonderfully uncomplicated about cereal treats.
No mixer. No oven. No complicated decorating. Just a handful of familiar ingredients coming together to create something colorful, chewy, buttery, and completely fun.
For me, that’s exactly what good home cooking should feel like sometimes.
Not every dessert needs to be elaborate. Some of the most memorable treats are the ones you can make quickly, cut into squares, and pass around while everyone reaches for another piece.
This Fruity Pebbles Rice Krispies Treats Recipe is one of those recipes. It’s nostalgic enough for adults who remember eating colorful cereal as kids, but playful enough to make children light up when they see that rainbow-colored tray.
And don’t be afraid to make it your own. Add white chocolate. Toss in extra marshmallows. Sprinkle the top with colorful decorations. Cut the treats into fun shapes. There really isn’t a wrong way to make them as long as you keep that soft, chewy texture in mind.
So grab a box of Fruity Pebbles, melt some butter and marshmallows, and give yourself permission to make something wonderfully simple.
Sometimes the happiest desserts are the ones that make your kitchen look like a rainbow.
Recipe Card
Recipe Name: Fruity Pebbles Rice Krispies Treats
Prep Time: 10 minutes
Cook Time: 5 minutes
Setting Time: 30–60 minutes
Total Time: About 45–75 minutes
Serves: 12–16 treats
Cuisine: American
Course: Dessert / Snack
Calories: Approximately 180 calories per serving
Ingredients
- 6 cups Fruity Pebbles cereal
- 10 ounces mini marshmallows
- 4 tablespoons unsalted butter
- 1 teaspoon vanilla extract
- Pinch of salt
- Optional: 1 cup extra mini marshmallows
- Optional: sprinkles or melted white chocolate for decorating
Instructions
- Line a 9 x 13-inch pan with parchment paper and lightly grease it.
- Melt the butter in a large saucepan over low heat.
- Add the mini marshmallows and stir gently until completely melted and smooth.
- Remove from the heat and stir in vanilla extract and a pinch of salt.
- Add the Fruity Pebbles and gently fold until evenly coated.
- Fold in extra mini marshmallows if desired.
- Transfer the mixture to the prepared pan.
- Lightly grease your hands or a piece of parchment paper and gently press the mixture into an even layer.
- Allow the treats to cool and set for 30–60 minutes.
- Lift the treats from the pan, slice into squares, and serve.
Chef’s Note: For the softest, chewiest treats, avoid overheating the marshmallows and don’t press the cereal mixture too firmly into the pan.
More Delicious Recipes
https://foodnesty.com/ninja-creami-vanilla-ice-cream-recipe/
https://foodnesty.com/blueberry-cream-cheese-muffins-recipe/
https://foodnesty.com/chicken-caesar-smash-tacos-recipe/
Fruity Pebbles Rice Krispies Treats Recipe
Equipment
- Large saucepan or Dutch oven
- Wooden spoon or silicone spatula
- 9 x 13-inch baking pan
- Measuring cups
- Measuring spoons
- Parchment paper or nonstick cooking spray
- Large mixing bowl, if preferred
- Sharp knife for slicing
Ingredients
Fruity Pebbles Cereal
- 6 cups Fruity Pebbles cereal
Mini Marshmallows
- 10 ounces mini marshmallows
Butter
- 4 tablespoons unsalted butter
Salt
- Pinch of salt
Vanilla Extract
- 1 teaspoon vanilla extract
Optional Toppings
- If you’re feeling creative you can also use:
- White chocolate chips
- Melted white chocolate
- Rainbow sprinkles
- Mini marshmallows
- Fruity Pebbles for garnish
- Colored candy melts
- Freeze-dried fruit pieces
- You don’t need any of these extras but they can turn a simple cereal bar into a party dessert.
Instructions
Step 1: Prepare the Pan
- Start by lining a 9 x 13-inch baking pan with parchment paper.
- Leave a little parchment hanging over two sides. This creates handles that make it much easier to lift the finished treats out of the pan.
- Lightly spray the parchment with nonstick cooking spray or rub it with a little butter.
- Don’t skip this step.
- Melted marshmallow mixture is wonderfully sticky, but that same stickiness can make you question your life choices when it gets stuck to your pan.
Step 2: Melt the Butter
- Place the butter in a large saucepan over low heat.
- Let it melt gently.
- You don’t want the butter sizzling or browning for this particular recipe. We’re looking for a smooth, melted base.
Step 3: Add the Marshmallows
- Add the mini marshmallows to the melted butter.
- Stir continuously with a silicone spatula or wooden spoon.
- Keep the heat low and continue stirring until the marshmallows become smooth and almost completely melted.
- This usually takes just a few minutes.
Step 4: Add Vanilla and Salt
- Once the marshmallows are melted, remove the saucepan from the heat.
- Stir in the vanilla extract and a small pinch of salt.
- The mixture should be glossy, smooth, and wonderfully sticky.
- This is the moment when your kitchen starts smelling like dessert.
Step 5: Add the Fruity Pebbles
- Pour the Fruity Pebbles into the saucepan.
- Gently fold the cereal into the melted marshmallow mixture.
- Use a large spatula and work fairly quickly, because the marshmallow mixture will begin to firm up as it cools.
- Make sure you reach the bottom and sides of the saucepan so all of the cereal gets coated.
Step 6: Add Extra Marshmallows If Desired
- If you’re using reserved mini marshmallows, let the cereal mixture cool for about 30 seconds to a minute before gently folding them in.
- This gives you little soft marshmallow pieces throughout the bars.
- I really like this trick because it creates a nice texture contrast.
Step 7: Press Into the Pan
- Transfer the cereal mixture into your prepared pan.
- Now comes the slightly messy part.
- Lightly grease your hands or spray a piece of parchment paper with nonstick spray. Gently press the mixture into an even layer.
- Don’t compact it too aggressively.
- This is one of the biggest secrets to soft cereal treats.
- If you press the mixture down with all your strength, you’ll end up with dense, hard bars. Instead, gently press just enough to hold everything together.
Step 8: Let the Treats Set
- Allow the treats to cool at room temperature for about 30 to 60 minutes.
- You want them firm enough to slice but still soft and chewy.
- There’s no need to refrigerate them unless you’re in a particularly warm kitchen.
Step 9: Slice and Serve
- Use the parchment paper handles to lift the entire slab from the pan.
- Place it on a cutting board and use a sharp knife to cut it into squares.
- For party-sized portions, cut smaller squares. For generous dessert portions, make larger bars.
- And yes, you are absolutely allowed to eat the first imperfect corner piece while slicing.
- That’s chef’s privilege.

Sarah Miller is a home cook and recipe developer at Foodnesty. She loves creating simple, comforting, and family-friendly recipes using easy ingredients. Her goal is to help everyone cook delicious food with confidence.