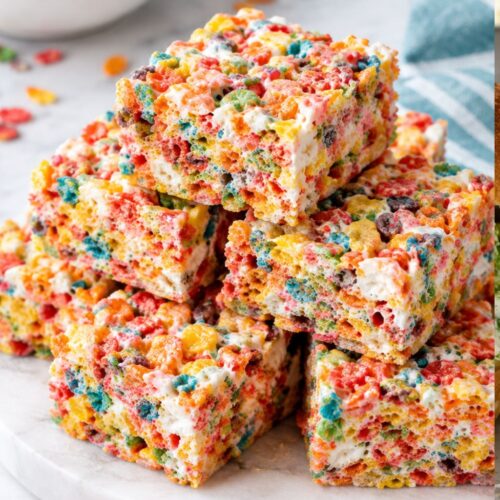
Fruity Pebbles Rice Krispies Treats Recipe
Make this Fruity Pebbles Rice Krispies Treats Recipe with buttery marshmallows and crispy cereal for a colorful, chewy, fruity dessert everyone will love!
Equipment
- Large saucepan or Dutch oven
- Wooden spoon or silicone spatula
- 9 x 13-inch baking pan
- Measuring cups
- Measuring spoons
- Parchment paper or nonstick cooking spray
- Large mixing bowl, if preferred
- Sharp knife for slicing
Ingredients
Fruity Pebbles Cereal
- 6 cups Fruity Pebbles cereal
Mini Marshmallows
- 10 ounces mini marshmallows
Butter
- 4 tablespoons unsalted butter
Salt
- Pinch of salt
Vanilla Extract
- 1 teaspoon vanilla extract
Optional Toppings
- If you're feeling creative you can also use:
- White chocolate chips
- Melted white chocolate
- Rainbow sprinkles
- Mini marshmallows
- Fruity Pebbles for garnish
- Colored candy melts
- Freeze-dried fruit pieces
- You don't need any of these extras but they can turn a simple cereal bar into a party dessert.
Instructions
Step 1: Prepare the Pan
- Start by lining a 9 x 13-inch baking pan with parchment paper.
- Leave a little parchment hanging over two sides. This creates handles that make it much easier to lift the finished treats out of the pan.
- Lightly spray the parchment with nonstick cooking spray or rub it with a little butter.
- Don't skip this step.
- Melted marshmallow mixture is wonderfully sticky, but that same stickiness can make you question your life choices when it gets stuck to your pan.
Step 2: Melt the Butter
- Place the butter in a large saucepan over low heat.
- Let it melt gently.
- You don't want the butter sizzling or browning for this particular recipe. We're looking for a smooth, melted base.
Step 3: Add the Marshmallows
- Add the mini marshmallows to the melted butter.
- Stir continuously with a silicone spatula or wooden spoon.
- Keep the heat low and continue stirring until the marshmallows become smooth and almost completely melted.
- This usually takes just a few minutes.
Step 4: Add Vanilla and Salt
- Once the marshmallows are melted, remove the saucepan from the heat.
- Stir in the vanilla extract and a small pinch of salt.
- The mixture should be glossy, smooth, and wonderfully sticky.
- This is the moment when your kitchen starts smelling like dessert.
Step 5: Add the Fruity Pebbles
- Pour the Fruity Pebbles into the saucepan.
- Gently fold the cereal into the melted marshmallow mixture.
- Use a large spatula and work fairly quickly, because the marshmallow mixture will begin to firm up as it cools.
- Make sure you reach the bottom and sides of the saucepan so all of the cereal gets coated.
Step 6: Add Extra Marshmallows If Desired
- If you're using reserved mini marshmallows, let the cereal mixture cool for about 30 seconds to a minute before gently folding them in.
- This gives you little soft marshmallow pieces throughout the bars.
- I really like this trick because it creates a nice texture contrast.
Step 7: Press Into the Pan
- Transfer the cereal mixture into your prepared pan.
- Now comes the slightly messy part.
- Lightly grease your hands or spray a piece of parchment paper with nonstick spray. Gently press the mixture into an even layer.
- Don't compact it too aggressively.
- This is one of the biggest secrets to soft cereal treats.
- If you press the mixture down with all your strength, you'll end up with dense, hard bars. Instead, gently press just enough to hold everything together.
Step 8: Let the Treats Set
- Allow the treats to cool at room temperature for about 30 to 60 minutes.
- You want them firm enough to slice but still soft and chewy.
- There's no need to refrigerate them unless you're in a particularly warm kitchen.
Step 9: Slice and Serve
- Use the parchment paper handles to lift the entire slab from the pan.
- Place it on a cutting board and use a sharp knife to cut it into squares.
- For party-sized portions, cut smaller squares. For generous dessert portions, make larger bars.
- And yes, you are absolutely allowed to eat the first imperfect corner piece while slicing.
- That's chef's privilege.