
Intro
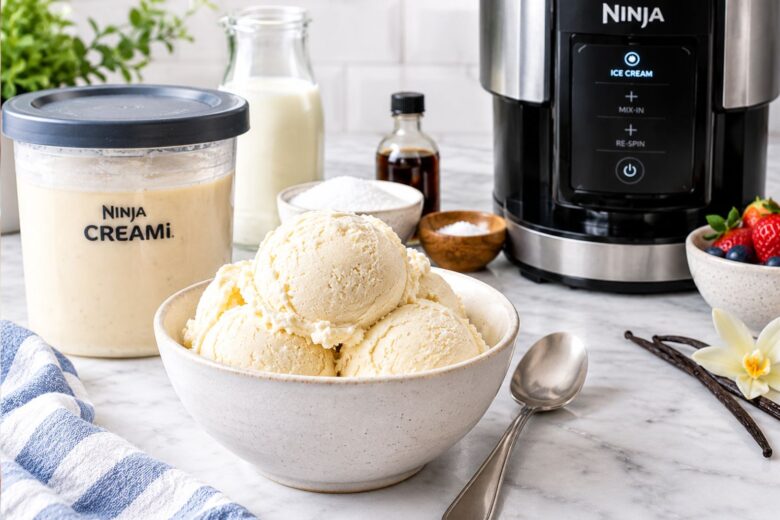
There are some desserts that never really go out of style, and vanilla ice cream is definitely one of them. I know vanilla can sound a little too simple at first, but when it is creamy, cold, sweet, and full of real vanilla flavor, it is anything but boring. This Ninja Creami vanilla ice cream is one of those recipes I keep coming back to whenever I want an easy homemade dessert without making a complicated custard.
As a female chef and someone who genuinely loves cooking at home, I have to admit that I appreciate recipes that don’t make me work harder than necessary. Sometimes I want to spend an afternoon baking a beautiful cake. Other times, I just want to open the freezer and know that something delicious is waiting for me.
That’s exactly where this recipe comes in.
The base is wonderfully simple. You need whole milk, heavy cream, granulated sugar, pure vanilla extract, and a tiny pinch of salt. That’s it. No eggs, no stovetop custard, and no complicated ice cream-making technique. The Ninja CREAMi does the heavy lifting after the mixture has frozen.
The result is rich and creamy with a lovely vanilla aroma, gentle sweetness, and a soft, almost silky texture. The heavy cream gives it richness, while whole milk keeps the ice cream from feeling overwhelmingly heavy. Vanilla brings that familiar warm flavor, and the salt quietly makes everything taste a little more balanced.
And honestly? This is the kind of homemade ice cream that makes you want to eat one spoonful straight from the pint before anyone else knows it’s ready.
So grab your CREAMi pint, clear a little freezer space, and let’s make some ice cream.
What Is Ninja Creami Vanilla Ice Cream?
Ninja Creami vanilla ice cream is homemade vanilla ice cream prepared by freezing an ice cream base in a Ninja CREAMi pint and then processing that frozen base with the machine’s ice cream program.
Unlike a traditional ice cream maker, you don’t need to churn a liquid mixture while it freezes. Instead, the mixture freezes completely first, and the CREAMi processes the solid base afterward. Many recipes follow this basic pattern: combine the ingredients, freeze the pint until solid, run the ICE CREAM program, and re-spin if necessary.
I love this method because it feels almost backwards the first time you try it.
You make what looks like a very thin, milky mixture. You freeze it. You take it out the next day and think, “Well, that certainly doesn’t look like ice cream.”
Then the machine spins it.
Suddenly, that frozen block transforms into something creamy and soft enough to scoop.
What Does It Taste Like?
The flavor is classic vanilla all the way through.
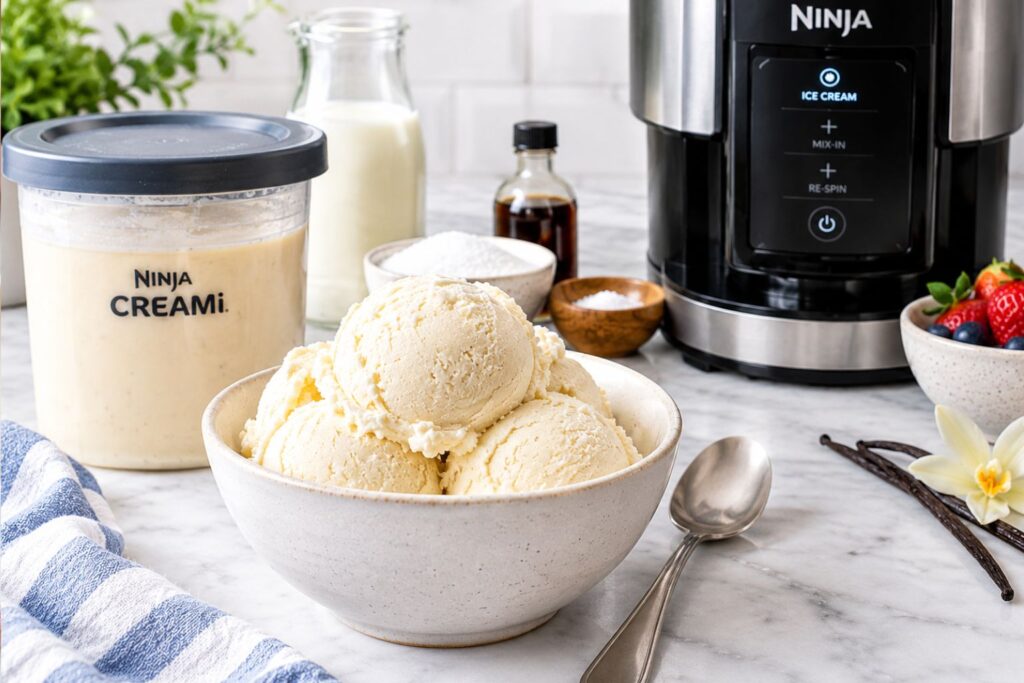
You get a creamy dairy flavor from the heavy cream and whole milk, followed by the sweet, floral warmth of vanilla. The sugar provides enough sweetness to make the vanilla pop without completely taking over.
I like adding a small pinch of salt because it helps round everything out. You shouldn’t taste “salty” ice cream. Instead, the vanilla tastes fuller, and the sweetness feels less one-dimensional.
The finished texture is rich, smooth, and creamy. It’s especially lovely straight from the machine when it has that soft-serve-like consistency.
If you prefer a firmer scoop, you can transfer the finished ice cream to a freezer-safe container and let it firm up before serving.
Why Vanilla Is Actually a Great CREAMi Flavor
Vanilla is the perfect starting point because it gives you a clean base for experimenting.
Once you have the vanilla recipe down, you can turn it into:
- Chocolate chip vanilla
- Cookie-and-cream ice cream
- Strawberry vanilla
- Birthday cake ice cream
- Caramel vanilla
- Brownie batter ice cream
- Cinnamon cookie ice cream
- Peanut butter swirl ice cream
- Chocolate fudge ripple
The basic vanilla mixture also works beautifully with toppings. Fresh berries, chocolate sauce, caramel, chopped nuts, sprinkles, crushed cookies, and warm brownies are all welcome here.
Equipment List
You don’t need a kitchen full of fancy equipment for this recipe.
Ninja CREAMi Machine
Obviously, this is the star of the show. Use your specific machine according to its manufacturer’s instructions, since controls and programs can vary between models.
Ninja CREAMi Pint
You’ll need the appropriate pint container for your machine. Make sure the mixture stays below the maximum fill line.
Mixing Bowl
A medium or large bowl gives you enough room to whisk everything together without splashing milk all over the counter.
Whisk
A regular hand whisk works perfectly. You don’t need an electric mixer.
Measuring Cups and Spoons
Accurate measurements matter, especially with ice cream. Too much or too little sugar can noticeably affect the sweetness and texture.
Silicone Spatula
This isn’t essential, but I love having one nearby for scraping the sides of the bowl and getting every last bit of the mixture into the pint.
Freezer
You’ll need enough freezer space to place the pint upright on a level surface. The base needs to freeze completely solid before processing.
Ingredients With Quantities
Here’s everything you need for one CREAMi pint.
1 cup whole milk
Whole milk gives the ice cream a creamy dairy flavor while keeping the mixture from becoming excessively rich.
I recommend whole milk if you have it because it gives a nicer texture than lower-fat milk. Reduced-fat milk can work, but the finished ice cream may be less creamy.
1 cup heavy cream
This is what brings the richness.
Heavy cream gives the ice cream that luxurious mouthfeel we associate with classic ice cream. You don’t need an enormous amount; the combination of cream and milk gives you a nice balance.
½ cup granulated sugar
Sugar does more than make the ice cream sweet. It also contributes to the texture of the frozen mixture.
Whisk it thoroughly into the milk and cream so there aren’t undissolved crystals sitting at the bottom of the bowl.
2 teaspoons pure vanilla extract
This is where the personality comes from.
For the best flavor, I like pure vanilla extract rather than imitation vanilla. You can also use vanilla bean paste if you love those little vanilla-speckled ice creams. Some classic CREAMi recipes use vanilla extract or vanilla bean paste for a strong vanilla profile.
Pinch of fine salt
Just a tiny pinch.
Don’t skip it simply because we’re making a sweet dessert. Salt helps balance sweetness and makes the vanilla taste more pronounced.
Instructions
Step 1: Combine the Milk and Sugar
Pour the whole milk into a mixing bowl.
Add the granulated sugar and whisk well.
Keep whisking until the sugar has dissolved as much as possible. This only takes a couple of minutes.
I don’t recommend rushing this little step. You don’t want a layer of sugar sitting at the bottom of your bowl.
Step 2: Add the Heavy Cream
Pour in the heavy cream and gently whisk until the milk and cream are completely combined.
The mixture should look smooth and creamy but still be completely liquid.
No cooking is necessary for this recipe.
That’s one of the reasons I love making it.
Step 3: Add Vanilla and Salt
Add the vanilla extract and a small pinch of salt.
Whisk again.
At this point, give your mixture a little taste. Since it isn’t frozen yet, the flavor will taste slightly different from the finished ice cream, but you should be able to tell whether the vanilla comes through clearly.
If you’re using vanilla bean paste, this is also the stage to add it.
Step 4: Pour Into the CREAMi Pint
Carefully pour the mixture into your Ninja CREAMi pint.
Don’t fill beyond the maximum fill line.
Place the lid securely on the container.
Take a second to check the outside of the pint for any drips before placing it in the freezer. Nobody wants a frozen puddle stuck to the freezer shelf!
Step 5: Freeze Until Completely Solid
Place the pint on a level surface in your freezer.
Freeze it until the mixture is completely solid. For best results, plan on about 24 hours. Classic CREAMi recipes commonly recommend a full 24-hour freeze before processing.
And yes, I know.
Waiting 24 hours for vanilla ice cream feels slightly cruel.
But this is one of those recipes where patience pays off.
Don’t try to process a partially frozen pint just because you’re impatient for dessert.
Step 6: Process the Frozen Base
When you’re ready to make your ice cream, remove the pint from the freezer.
Take off the storage lid and follow the instructions for your specific Ninja CREAMi model to install the pint.
Select the ICE CREAM program.
Then let your machine do its thing.
This is my favorite part because the transformation is so satisfying.
What started as a frozen, rock-solid mixture becomes creamy ice cream right before your eyes.
Step 7: Check the Texture
Once the cycle finishes, open the machine and look at your ice cream.
Sometimes it comes out beautifully creamy on the first cycle.
Other times, especially depending on your freezer and the exact ingredients used, it may look a little crumbly or powdery.
Don’t panic.
That’s not necessarily a failed batch.
Use the RE-SPIN function according to your machine’s instructions. Re-spinning is a common step for getting a smoother texture when the first processing cycle leaves the ice cream looking crumbly.
Step 8: Serve
Once the texture is smooth and creamy, serve immediately.
This is when the ice cream has that gorgeous soft, scoopable texture.
Spoon it into bowls, cones, waffle bowls, or simply grab a spoon and eat it directly from the pint.
I won’t judge.
Why This Recipe Works
The beauty of this recipe is in its simplicity.
Every ingredient has a job.
The whole milk provides a lighter dairy base and balances the richness of the cream.
The heavy cream contributes fat and richness, helping create that satisfying creamy mouthfeel.
The sugar adds sweetness while also helping the frozen mixture remain more pleasant to eat rather than becoming an unpleasant block of ice.
The vanilla extract gives the dessert its signature flavor.
And the salt balances the sweetness and helps the vanilla taste more noticeable.
It’s a small ingredient list, but there is a reason classic vanilla ice cream doesn’t need twenty ingredients.
Sometimes simple really is better.
My Tips for the Creamiest Vanilla Ice Cream
Use Good Vanilla
Vanilla is the main flavor here, so this is not the time to use an old bottle that’s been sitting in the back of your pantry for years.
Pure vanilla extract gives excellent results, while vanilla bean paste can provide an even more intense vanilla flavor.
Don’t Overdo the Sugar
More sugar doesn’t automatically mean better ice cream.
Too much sweetness can overwhelm the delicate vanilla flavor. I prefer a balanced sweetness that lets the dairy and vanilla shine.
Freeze the Pint Flat
A level freezer shelf is your friend.
You want the mixture to freeze as evenly as possible. An unevenly frozen pint can make processing less consistent.
Give It the Full Freeze
I know I already said this, but it’s worth repeating.
Give your pint enough time to freeze completely. A common recommendation is around 24 hours.
This is one of those recipes where planning ahead makes the actual dessert-making part incredibly easy.
Don’t Be Nervous About a Crumbly First Spin
This is probably the biggest beginner worry.
You open the machine and see something that looks more like frozen crumbs than ice cream.
Take a breath.
The CREAMi is designed to process the frozen base, and a re-spin can help turn that crumbly texture into something smooth and creamy.
How to Make the Vanilla Flavor Even Stronger
If you’re a serious vanilla lover, there are a few easy ways to intensify the flavor.
Use Vanilla Bean Paste
Replace some or all of the vanilla extract with vanilla bean paste.
You’ll get a deeper vanilla aroma and those beautiful tiny vanilla seeds throughout the ice cream.
Add a Vanilla Bean
For an extra-special batch, scrape the seeds from a vanilla bean and stir them into the base.
This is especially lovely when you’re making ice cream for guests.
Use High-Quality Pure Vanilla Extract
You don’t necessarily need the most expensive vanilla in the store. Just choose a good-quality pure vanilla extract with a flavor you enjoy.
Delicious Mix-Ins and Toppings
One of my favorite things about vanilla ice cream is that it gives you a blank canvas.
Once your base has been processed, you can add your favorite mix-ins using the appropriate mix-in function on your machine. The Ninja CREAMi can be used with additions such as chocolate chips, crushed cookies, sprinkles, and candy pieces.
Try these combinations:
Chocolate Chip Vanilla
Add mini chocolate chips for a classic combination.
Cookies and Cream
Crush chocolate sandwich cookies and mix them into the finished vanilla ice cream.
Strawberry Shortcake
Top vanilla ice cream with sliced strawberries and crushed shortbread cookies.
Caramel Pecan
Drizzle caramel sauce over the ice cream and sprinkle with toasted pecans.
Brownie Sundae
Add warm brownie pieces, chocolate sauce, and a little whipped cream.
Birthday Cake
Mix in colorful sprinkles and small pieces of vanilla cake.
Cinnamon Cookie
Crushed cinnamon cookies make the vanilla base taste warm, cozy, and bakery-like.
What to Serve With Vanilla Ice Cream
A scoop of vanilla is basically the ultimate dessert sidekick.
Serve it alongside:
- Warm brownies
- Apple pie
- Peach cobbler
- Chocolate cake
- Chocolate chip cookies
- Fresh berries
- Waffles
- Pancakes
- Cinnamon rolls
- Warm fruit crumble
One of my favorite combinations is a warm homemade brownie with a scoop of cold vanilla ice cream sitting right on top.
The brownie is soft and fudgy.
The ice cream slowly melts around the edges.
You get hot and cold, chocolate and vanilla, rich and creamy all in one bite.
That’s the kind of dessert I never get tired of.
How to Store Leftover Ice Cream
If you aren’t eating the whole pint immediately, keep it covered and frozen.
Because homemade ice cream can become quite firm after sitting in the freezer, you may want to process it again when you’re ready to eat it.
For the best texture, I personally prefer making smaller batches that I know I’ll enjoy within a few days.
And let’s be honest, with vanilla ice cream this good, leftovers aren’t exactly a major problem.
Can I Make This Recipe Ahead?
Absolutely.
In fact, making it ahead is part of the whole point.
Prepare the base, pour it into the pint, freeze it, and leave it there until you’re ready for dessert.
That’s what makes Ninja Creami vanilla ice cream such a useful recipe for entertaining. You can prepare the pint well ahead of time and process it shortly before serving.
If you’re having friends or family over for dinner, prepare several pints in advance and let everyone choose their toppings.
Set out chocolate sauce, caramel, sprinkles, cookies, berries, nuts, and whipped cream.
Suddenly, you’ve got a little homemade ice cream bar.
And everybody thinks you worked much harder than you actually did.
Easy Variations to Try
Once you’ve mastered the basic vanilla base, don’t stop there.
Chocolate Vanilla
Add a little cocoa powder to the base for a richer chocolate flavor.
Coffee Vanilla
Add a small amount of instant espresso powder for a coffeehouse-inspired dessert.
Cinnamon Vanilla
Add ground cinnamon for a warm, cozy twist.
Honey Vanilla
Replace part of the granulated sugar with honey for a softer, floral sweetness.
Strawberry Vanilla
Serve the finished ice cream with fresh strawberries or swirl in a strawberry sauce.
Peanut Butter Vanilla
Add creamy peanut butter and finish with chopped peanuts.
The vanilla base is forgiving and adaptable, which is exactly why I think it’s such a good recipe for beginners.
Common Questions
Why is my Ninja CREAMi ice cream crumbly?
A crumbly appearance after the first cycle can happen. Try using the RE-SPIN function according to your machine’s instructions. Some recipes also recommend adding a small splash of milk before re-spinning when additional moisture is needed.
Can I use 2% milk?
Yes, you can, but whole milk generally gives a richer and creamier result.
Can I use vanilla bean paste instead of vanilla extract?
Absolutely. Vanilla bean paste is a fantastic option if you want a stronger vanilla flavor and visible vanilla specks.
Do I have to freeze it for 24 hours?
For the most reliable results, I recommend freezing the pint completely solid, with 24 hours being a common guideline for CREAMi recipes.
Can I add chocolate chips?
Yes. Process the vanilla ice cream first, then use the appropriate MIX-IN function for your model to incorporate chocolate chips or other additions.
Why You’ll Love This Recipe
There are plenty of fancy ice cream recipes out there, but this one has a special place in my kitchen because it is reliable, flexible, and incredibly easy.
You don’t need eggs.
You don’t need to cook a custard.
You don’t need to stand over a saucepan.
You don’t need to babysit an old-fashioned ice cream machine.
You simply mix, freeze, spin, and enjoy.
The flavor is creamy and unmistakably vanilla, with enough sweetness to feel indulgent without becoming overwhelming. The heavy cream gives it richness, while whole milk keeps it balanced.
And once you understand how the base works, you can start playing around with flavors and mix-ins.
That’s what I love most about Ninja Creami vanilla ice cream. It’s not just one dessert. It’s the starting point for dozens of homemade ice cream ideas.
Final Thoughts
If you’ve recently bought a Ninja CREAMi and aren’t sure where to begin, I honestly think vanilla is one of the best recipes to try first.
It teaches you the basics without making things complicated.
You learn how the frozen base should look, how the machine processes it, what a re-spin does, and how different ingredients affect texture.
And at the end of it all, you get a bowl of creamy homemade vanilla ice cream.
For me, that’s the magic of cooking at home. It doesn’t always have to be complicated or impressive. Sometimes it’s just about taking a few everyday ingredients—milk, cream, sugar, vanilla, and a pinch of salt—and turning them into something that makes everyone smile.
So make a pint, freeze it overnight, spin it the next day, and put your favorite toppings on the table.
Then grab a spoon.
Because once that first scoop is sitting in your bowl, you’ll understand why this simple Ninja Creami vanilla ice cream deserves a permanent spot in your dessert rotation.
More Delicious Recipes
https://foodnesty.com/blueberry-cream-cheese-muffins-recipe/
https://foodnesty.com/lemon-pepper-chicken-thighs-recipe/
https://foodnesty.com/the-ultimate-hot-chocolate-bar-a-cozy-and-fun-way-to-serve-hot-cocoa/
Ninja Creami Vanilla Ice Cream Recipe
Equipment
- Ninja CREAMi Machine
- Ninja CREAMi Pint
- Mixing bowl
- Whisk
- Measuring cups and spoons
- Silicone Spatula
- Freezer
Ingredients
1 cup whole milk
- Whole milk gives the ice cream a creamy dairy flavor while keeping the mixture from becoming excessively rich.
- I recommend whole milk if you have it because it gives a nicer texture than lower-fat milk. Reduced-fat milk can work but the finished ice cream may be less creamy.
1 cup heavy cream
- This is what brings the richness.
- Heavy cream gives the ice cream that luxurious mouthfeel we associate with classic ice cream. You don’t need an enormous amount; the combination of cream and milk gives you a nice balance.
½ cup granulated sugar
- Sugar does more than make the ice cream sweet. It also contributes to the texture of the frozen mixture.
- Whisk it thoroughly into the milk and cream so there aren’t undissolved crystals sitting at the bottom of the bowl.
2 teaspoons pure vanilla extract
- This is where the personality comes from.
Pinch of fine salt
- Just a tiny pinch.
- Don’t skip it simply because we’re making a sweet dessert. Salt helps balance sweetness and makes the vanilla taste more pronounced.
Instructions
Step 1: Combine the Milk and Sugar
- Pour the whole milk into a mixing bowl.
- Add the granulated sugar and whisk well.
- Keep whisking until the sugar has dissolved as much as possible. This only takes a couple of minutes.
- I don’t recommend rushing this little step. You don’t want a layer of sugar sitting at the bottom of your bowl.
Step 2: Add the Heavy Cream
- Pour in the heavy cream and gently whisk until the milk and cream are completely combined.
- The mixture should look smooth and creamy but still be completely liquid.
- No cooking is necessary for this recipe.
- That’s one of the reasons I love making it.
Step 3: Add Vanilla and Salt
- Add the vanilla extract and a small pinch of salt.
- Whisk again.
- At this point, give your mixture a little taste. Since it isn’t frozen yet, the flavor will taste slightly different from the finished ice cream, but you should be able to tell whether the vanilla comes through clearly.
- If you’re using vanilla bean paste, this is also the stage to add it.
Step 4: Pour Into the CREAMi Pint
- Carefully pour the mixture into your Ninja CREAMi pint.
- Don’t fill beyond the maximum fill line.
- Place the lid securely on the container.
- Take a second to check the outside of the pint for any drips before placing it in the freezer. Nobody wants a frozen puddle stuck to the freezer shelf!
Step 5: Freeze Until Completely Solid
- Place the pint on a level surface in your freezer.
- Freeze it until the mixture is completely solid. For best results, plan on about 24 hours. Classic CREAMi recipes commonly recommend a full 24-hour freeze before processing.
- And yes, I know.
- Waiting 24 hours for vanilla ice cream feels slightly cruel.
- But this is one of those recipes where patience pays off.
- Don’t try to process a partially frozen pint just because you’re impatient for dessert.
Step 6: Process the Frozen Base
- When you’re ready to make your ice cream, remove the pint from the freezer.
- Take off the storage lid and follow the instructions for your specific Ninja CREAMi model to install the pint.
- Select the ICE CREAM program.
- Then let your machine do its thing.
- This is my favorite part because the transformation is so satisfying.
- What started as a frozen, rock-solid mixture becomes creamy ice cream right before your eyes.
Step 7: Check the Texture
- Once the cycle finishes, open the machine and look at your ice cream.
- Sometimes it comes out beautifully creamy on the first cycle.
- Other times, especially depending on your freezer and the exact ingredients used, it may look a little crumbly or powdery.
- Don’t panic.
- That’s not necessarily a failed batch.
- Use the RE-SPIN function according to your machine’s instructions. Re-spinning is a common step for getting a smoother texture when the first processing cycle leaves the ice cream looking crumbly.
Step 8: Serve
- Once the texture is smooth and creamy, serve immediately.
- This is when the ice cream has that gorgeous soft, scoopable texture.
- Spoon it into bowls, cones, waffle bowls, or simply grab a spoon and eat it directly from the pint.
- I won’t judge.

Sarah Miller is a home cook and recipe developer at Foodnesty. She loves creating simple, comforting, and family-friendly recipes using easy ingredients. Her goal is to help everyone cook delicious food with confidence.