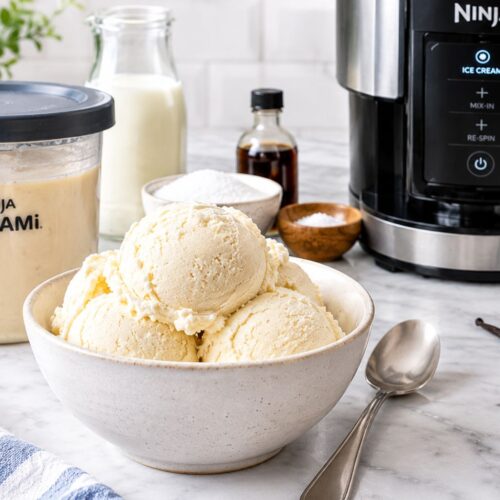
Ninja Creami Vanilla Ice Cream Recipe
Make a delicious Ninja Creami vanilla ice cream with milk, heavy cream, sugar, vanilla extract, and salt. Freeze, spin, and enjoy a creamy homemade treat.
Equipment
- Ninja CREAMi Machine
- Ninja CREAMi Pint
- Mixing bowl
- Whisk
- Measuring cups and spoons
- Silicone Spatula
- Freezer
Ingredients
1 cup whole milk
- Whole milk gives the ice cream a creamy dairy flavor while keeping the mixture from becoming excessively rich.
- I recommend whole milk if you have it because it gives a nicer texture than lower-fat milk. Reduced-fat milk can work but the finished ice cream may be less creamy.
1 cup heavy cream
- This is what brings the richness.
- Heavy cream gives the ice cream that luxurious mouthfeel we associate with classic ice cream. You don't need an enormous amount; the combination of cream and milk gives you a nice balance.
½ cup granulated sugar
- Sugar does more than make the ice cream sweet. It also contributes to the texture of the frozen mixture.
- Whisk it thoroughly into the milk and cream so there aren't undissolved crystals sitting at the bottom of the bowl.
2 teaspoons pure vanilla extract
- This is where the personality comes from.
Pinch of fine salt
- Just a tiny pinch.
- Don't skip it simply because we're making a sweet dessert. Salt helps balance sweetness and makes the vanilla taste more pronounced.
Instructions
Step 1: Combine the Milk and Sugar
- Pour the whole milk into a mixing bowl.
- Add the granulated sugar and whisk well.
- Keep whisking until the sugar has dissolved as much as possible. This only takes a couple of minutes.
- I don't recommend rushing this little step. You don't want a layer of sugar sitting at the bottom of your bowl.
Step 2: Add the Heavy Cream
- Pour in the heavy cream and gently whisk until the milk and cream are completely combined.
- The mixture should look smooth and creamy but still be completely liquid.
- No cooking is necessary for this recipe.
- That's one of the reasons I love making it.
Step 3: Add Vanilla and Salt
- Add the vanilla extract and a small pinch of salt.
- Whisk again.
- At this point, give your mixture a little taste. Since it isn't frozen yet, the flavor will taste slightly different from the finished ice cream, but you should be able to tell whether the vanilla comes through clearly.
- If you're using vanilla bean paste, this is also the stage to add it.
Step 4: Pour Into the CREAMi Pint
- Carefully pour the mixture into your Ninja CREAMi pint.
- Don't fill beyond the maximum fill line.
- Place the lid securely on the container.
- Take a second to check the outside of the pint for any drips before placing it in the freezer. Nobody wants a frozen puddle stuck to the freezer shelf!
Step 5: Freeze Until Completely Solid
- Place the pint on a level surface in your freezer.
- Freeze it until the mixture is completely solid. For best results, plan on about 24 hours. Classic CREAMi recipes commonly recommend a full 24-hour freeze before processing.
- And yes, I know.
- Waiting 24 hours for vanilla ice cream feels slightly cruel.
- But this is one of those recipes where patience pays off.
- Don't try to process a partially frozen pint just because you're impatient for dessert.
Step 6: Process the Frozen Base
- When you're ready to make your ice cream, remove the pint from the freezer.
- Take off the storage lid and follow the instructions for your specific Ninja CREAMi model to install the pint.
- Select the ICE CREAM program.
- Then let your machine do its thing.
- This is my favorite part because the transformation is so satisfying.
- What started as a frozen, rock-solid mixture becomes creamy ice cream right before your eyes.
Step 7: Check the Texture
- Once the cycle finishes, open the machine and look at your ice cream.
- Sometimes it comes out beautifully creamy on the first cycle.
- Other times, especially depending on your freezer and the exact ingredients used, it may look a little crumbly or powdery.
- Don't panic.
- That's not necessarily a failed batch.
- Use the RE-SPIN function according to your machine's instructions. Re-spinning is a common step for getting a smoother texture when the first processing cycle leaves the ice cream looking crumbly.
Step 8: Serve
- Once the texture is smooth and creamy, serve immediately.
- This is when the ice cream has that gorgeous soft, scoopable texture.
- Spoon it into bowls, cones, waffle bowls, or simply grab a spoon and eat it directly from the pint.
- I won't judge.