
Intro
There’s something deeply comforting about baking a dessert that feels both luxurious and homemade at the same time. I still remember the first time I made this Red Velvet Cheesecake Recipe—it was for a small family get-together, and I wanted something that looked fancy but felt like love on a plate. When I sliced into it and saw those beautiful red layers hugging the creamy cheesecake center, I knew I had found a forever favorite.
As a home chef who loves experimenting in the kitchen, I’ve learned that some desserts aren’t just about taste—they’re about experience. This one is soft, slightly chocolaty, creamy, tangy, and just sweet enough. Every bite melts slowly, and trust me, it’s the kind of dessert that makes people pause and smile.
If you’re someone who enjoys baking but doesn’t want complicated steps or confusing instructions, you’re in the right place. I’ll walk you through everything like we’re baking together in my kitchen.
What is the Red Velvet Cheesecake Recipe?
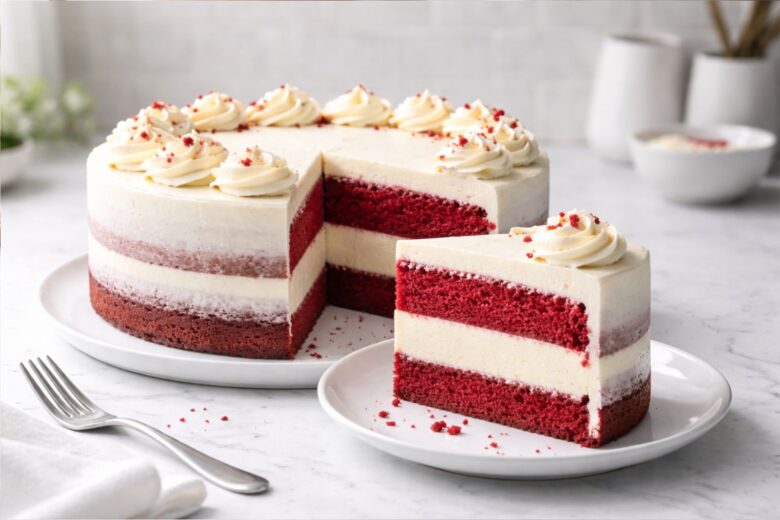
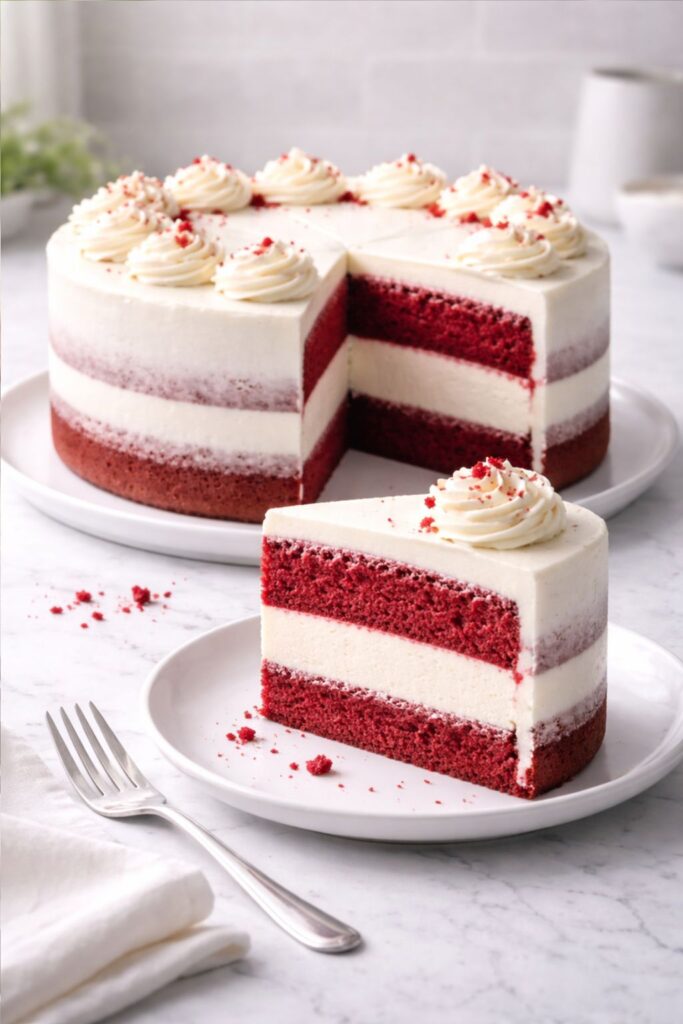
The Red Velvet Cheesecake Recipe is a dreamy combination of two classic desserts: red velvet cake and creamy cheesecake. Imagine soft, moist red velvet cake layers with their subtle cocoa flavor, paired with a rich, smooth cheesecake filling in between.
Red velvet itself isn’t just about color—it has a light chocolate taste, balanced with a slight tang from buttermilk and vinegar. When you add cheesecake into the mix, it creates a perfect contrast: fluffy meets creamy, bold meets smooth.
What makes this dessert special is the layering. You typically bake red velvet cake layers and a separate cheesecake layer, then assemble them with frosting—usually cream cheese frosting (which, honestly, is the best part for me 😄).
This dessert is perfect for birthdays, celebrations, or even when you just want to treat yourself after a long week.
Equipment List
Before we jump into baking, let’s gather everything you’ll need. I always say, a well-prepared kitchen makes baking feel easy and stress-free.
- 2 round cake pans (8 or 9-inch)
- 1 springform pan (for cheesecake)
- Mixing bowls (large and medium)
- Electric hand mixer or stand mixer
- Measuring cups and spoons
- Spatula
- Whisk
- Baking paper (parchment paper)
- Cooling rack
- Offset spatula (for frosting, optional but helpful)
- Knife for clean slicing
Ingredients (with quantities)
For the Red Velvet Cake:
- 2 ½ cups all-purpose flour
- 1 ½ cups granulated sugar
- 1 teaspoon baking soda
- 1 teaspoon salt
- 1 teaspoon cocoa powder
- 1 ½ cups vegetable oil
- 1 cup buttermilk
- 2 large eggs
- 2 tablespoons red food coloring
- 1 teaspoon vanilla extract
- 1 teaspoon white vinegar
For the Cheesecake Layer:
- 2 cups cream cheese (softened)
- ¾ cup sugar
- 2 eggs
- 1 teaspoon vanilla extract
- ½ cup sour cream
- 2 tablespoons flour
For the Cream Cheese Frosting:
- 2 cups cream cheese (softened)
- 1 cup butter (softened)
- 3–4 cups powdered sugar
- 1 teaspoon vanilla extract
Instructions
Step 1: Prepare the Cheesecake Layer
I always start with the cheesecake because it needs time to cool completely.
- Preheat your oven to 160°C (320°F).
- Line your springform pan with parchment paper.
- In a bowl, beat cream cheese until smooth and creamy.
- Add sugar and mix well.
- Add eggs one at a time, mixing gently.
- Stir in vanilla, sour cream, and flour.
Pour the batter into the pan and bake for about 40–45 minutes. The center should be slightly soft but not liquid.
Let it cool completely, then refrigerate for at least 2–3 hours (overnight is even better).
Step 2: Make the Red Velvet Cake
Now comes the fun part—the beautiful red cake layers.
- Preheat oven to 175°C (350°F).
- In a large bowl, mix flour, sugar, baking soda, salt, and cocoa powder.
- In another bowl, combine oil, buttermilk, eggs, food coloring, vanilla, and vinegar.
- Slowly mix wet ingredients into dry ingredients until smooth.
Divide the batter evenly into two pans and bake for 25–30 minutes.
Let the cakes cool completely before assembling.
Step 3: Prepare the Frosting
Cream cheese frosting is what ties everything together.
- Beat cream cheese and butter until fluffy.
- Add powdered sugar gradually.
- Mix in vanilla extract.
You should get a smooth, creamy frosting that spreads easily.
Step 4: Assemble the Cake
This is my favorite part—where everything comes together beautifully.
- Place one red velvet cake layer on your serving plate.
- Add a thin layer of frosting.
- Carefully place the cheesecake layer on top.
- Add another thin layer of frosting.
- Place the second red velvet cake layer on top.
Now frost the entire cake—top and sides.
You can keep it simple or decorate with crumbs, swirls, or even white chocolate shavings.
Flavor & Texture Experience
Let me describe the first bite—because that’s what matters most.
You cut through the soft red cake and creamy cheesecake layer. The fork glides smoothly. Then comes the taste…
- The red velvet is soft, slightly chocolaty, and moist
- The cheesecake is rich, creamy, and slightly tangy
- The frosting adds sweetness and silkiness
It’s balanced, not too sweet, and incredibly satisfying.
Tips from My Kitchen
After making this Red Velvet Cheesecake Recipe many times, here are some things I’ve learned:
- Always use room temperature ingredients for smooth mixing
- Don’t overmix the batter—it keeps the cake soft
- Chill the cheesecake well before assembling
- Use a sharp knife for clean slices
- Wipe the knife after each cut for neat layers
Common Mistakes to Avoid
Even simple recipes can go wrong if you’re not careful.
- Overbaking the cheesecake → makes it dry
- Skipping cooling time → layers won’t hold
- Too much food coloring → can affect taste
- Warm cake layers → frosting melts
Take your time. Baking is not a race.
Variations You Can Try
Once you’re comfortable, you can play around a bit:
- Add chocolate chips to the cheesecake layer
- Use strawberry topping for a fruity twist
- Make mini versions in cupcake form
- Try a no-bake cheesecake layer for convenience
Storage Tips
If you somehow have leftovers (rare in my house 😅):
- Store in fridge for up to 4–5 days
- Keep covered to avoid drying out
- You can freeze slices for up to 1 month
Serving Ideas
I love serving this cake slightly chilled. It enhances the cheesecake texture.
You can pair it with:
- A hot cup of coffee
- Light whipped cream
- Fresh berries
Final Thoughts
This Red Velvet Cheesecake Recipe is not just a dessert—it’s an experience. It’s something you bake when you want to impress, celebrate, or simply enjoy a moment of sweetness.
As a female chef who loves creating cozy, homemade dishes, this recipe holds a special place in my heart. It’s rich but not heavy, beautiful yet simple to make if you follow the steps carefully.
If you try it, don’t rush. Enjoy the process. Taste as you go. And most importantly—share it with people you love.
Because the best recipes are the ones that bring people together ❤️
More Delicious Recipes:
Edgar’s Strawberry Cake Recipe
Olive Garden Strawberry Cream Cake Recipe

Red Velvet Cheesecake Recipe
Equipment
- 2 round cake pans (8 or 9-inch)
- 1 springform pan (for cheesecake)
- Mixing bowls (large and medium)
- Electric hand mixer or stand mixer
- Measuring cups and spoons
- Spatula
- Whisk
- Baking paper (parchment paper)
- Cooling rack
- Offset spatula (for frosting, optional but helpful)
- Knife for clean slicing
Ingredients
For the Red Velvet Cake:
- 2 ½ cups all-purpose flour
- 1 ½ cups granulated sugar
- 1 teaspoon baking soda
- 1 teaspoon salt
- 1 teaspoon cocoa powder
- 1 ½ cups vegetable oil
- 1 cup buttermilk
- 2 large eggs
- 2 tablespoons red food coloring
- 1 teaspoon vanilla extract
- 1 teaspoon white vinegar
For the Cheesecake Layer:
- 2 cups cream cheese softened
- ¾ cup sugar
- 2 eggs
- 1 teaspoon vanilla extract
- ½ cup sour cream
- 2 tablespoons flour
For the Cream Cheese Frosting:
- 2 cups cream cheese softened
- 1 cup butter softened
- 3 –4 cups powdered sugar
- 1 teaspoon vanilla extract
Instructions
Step 1: Prepare the Cheesecake Layer
- I always start with the cheesecake because it needs time to cool completely.
- Preheat your oven to 160°C (320°F).
- Line your springform pan with parchment paper.
- In a bowl, beat cream cheese until smooth and creamy.
- Add sugar and mix well.
- Add eggs one at a time, mixing gently.
- Stir in vanilla, sour cream, and flour.
- Pour the batter into the pan and bake for about 40–45 minutes. The center should be slightly soft but not liquid.
- Let it cool completely, then refrigerate for at least 2–3 hours (overnight is even better).
Step 2: Make the Red Velvet Cake
- Now comes the fun part—the beautiful red cake layers.
- Preheat oven to 175°C (350°F).
- In a large bowl, mix flour, sugar, baking soda, salt, and cocoa powder.
- In another bowl, combine oil, buttermilk, eggs, food coloring, vanilla, and vinegar.
- Slowly mix wet ingredients into dry ingredients until smooth.
- Divide the batter evenly into two pans and bake for 25–30 minutes.
- Let the cakes cool completely before assembling.
Step 3: Prepare the Frosting
- Cream cheese frosting is what ties everything together.
- Beat cream cheese and butter until fluffy.
- Add powdered sugar gradually.
- Mix in vanilla extract.
- You should get a smooth, creamy frosting that spreads easily.
Step 4: Assemble the Cake
- This is my favorite part—where everything comes together beautifully.
- Place one red velvet cake layer on your serving plate.
- Add a thin layer of frosting.
- Carefully place the cheesecake layer on top.
- Add another thin layer of frosting.
- Place the second red velvet cake layer on top.
- Now frost the entire cake—top and sides.
- You can keep it simple or decorate with crumbs, swirls, or even white chocolate shavings.

Sarah Miller is a home cook and recipe developer at Foodnesty. She loves creating simple, comforting, and family-friendly recipes using easy ingredients. Her goal is to help everyone cook delicious food with confidence.