
Intro
There’s something magical about baking bread at home. The smell alone can turn an ordinary afternoon into a cozy memory. I still remember the first time I tried recreating the Wegmans Garlic Tuscan Bread Recipe in my own kitchen — flour dust on my apron, butter softening on the counter, and that irresistible promise of roasted garlic filling the air. I wasn’t aiming for perfection. I just wanted that rustic crust, fluffy inside, and deep garlicky flavor that makes you tear off piece after piece before it even cools.
As a chef who spends most days experimenting with flavors, I always come back to simple, honest recipes like this. Bread connects us — it’s comforting, grounding, and incredibly satisfying to make by hand. This loaf brings together golden olive oil, fresh garlic, herbs, and soft wheat dough to create something both humble and indulgent. It’s perfect for dipping into soup, serving with pasta, or just enjoying warm with salted butter melting into every pore.
In this article, I’ll guide you through my personal take on the recipe, with practical tips, storytelling from my own kitchen adventures, and plenty of sensory detail so you can truly enjoy the process. Whether you’re a beginner baker or someone who already loves kneading dough on a Sunday afternoon, I hope this guide inspires you to bake confidently and savor every bite.
Let’s roll up our sleeves and get started.
What is Wegmans Garlic Tuscan Bread Recipe?
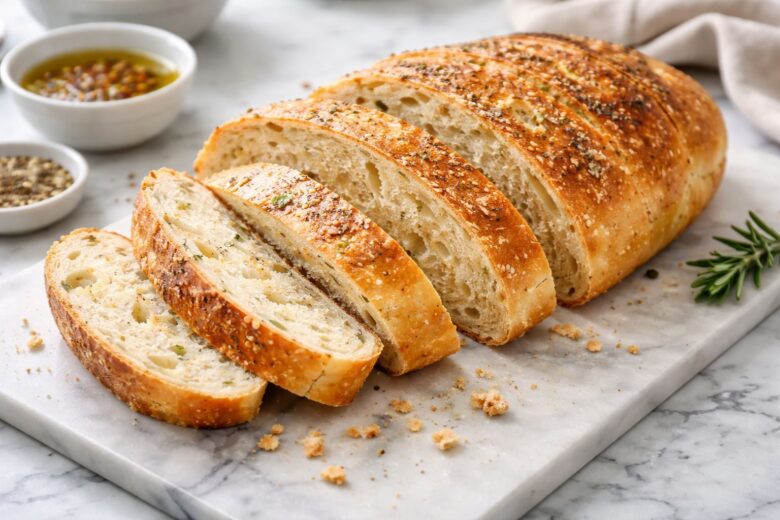
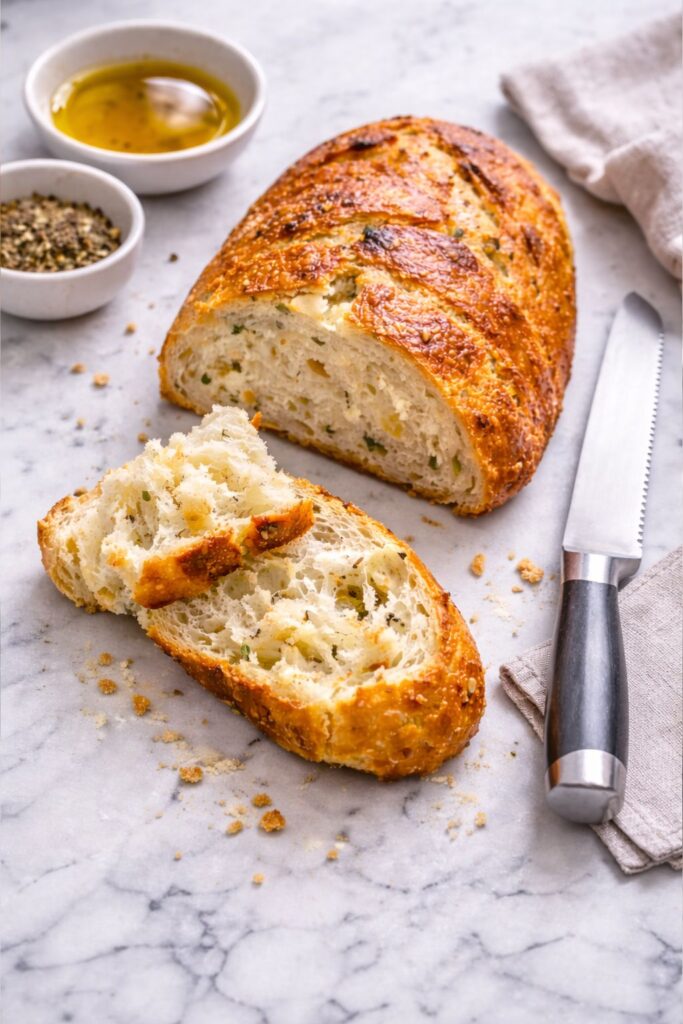
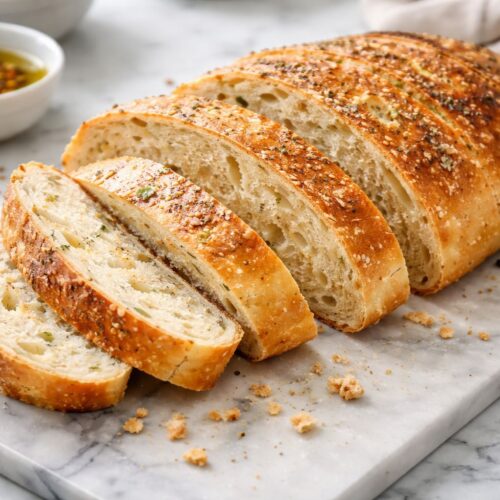
The Wegmans Garlic Tuscan Bread Recipe is inspired by a rustic Italian-style loaf known for its chewy crumb, crisp crust, and rich garlic infusion. Tuscan breads traditionally lean toward simplicity — flour, water, yeast, salt — but this version layers in aromatic garlic and olive oil for a flavor-packed twist that feels hearty and comforting.
When I think about Tuscan bread, I imagine farmhouse kitchens and wooden tables dusted with flour. The texture is rustic rather than delicate. It’s meant to be torn, dipped, and shared. That’s what makes this recipe so appealing — it blends authenticity with accessibility. You don’t need a professional oven or fancy techniques. Just patience, love for food, and a willingness to get your hands messy.
The garlic element transforms the loaf completely. Roasting or sautéing garlic mellows its sharpness and adds sweetness. When mixed into dough, it perfumes the entire loaf without overpowering it. Combined with olive oil, herbs, and salt, it creates layers of flavor that build with every bite.
From a culinary perspective, the bread pairs beautifully with tomato-based dishes, grilled vegetables, or creamy spreads. Personally, I enjoy serving it alongside roasted chicken or dipping it into herb-infused olive oil while chatting with friends.
This recipe isn’t about copying something exactly — it’s about capturing the spirit of that beloved loaf and making it your own.
Equipment List
Before we begin, I like to gather everything on my countertop. It saves time and makes the process calmer and more enjoyable. Here’s what you’ll need:
- Large mixing bowl
- Measuring cups and spoons
- Wooden spoon or dough whisk
- Clean kitchen towel or plastic wrap
- Baking sheet or bread stone
- Parchment paper
- Sharp knife or bread lame
- Small skillet (for garlic preparation)
- Cooling rack
I always say equipment doesn’t have to be fancy. My favorite bowl has tiny scratches from years of use, and it still does the job beautifully.
Ingredients (with quantities)
This ingredient list focuses on balance — enough garlic to shine, enough olive oil for richness, and just the right structure for a hearty loaf.
- 3 ½ cups all-purpose flour
- 1 ¼ cups warm water
- 2 teaspoons instant yeast
- 1 teaspoon sugar
- 1 ½ teaspoons salt
- 3 tablespoons olive oil
- 5 cloves garlic, finely minced or lightly roasted
- 1 teaspoon dried Italian herbs (optional but lovely)
- Extra flour for dusting
I often pause here to enjoy the simplicity. Flour feels soft between fingers, garlic smells sharp and alive, and olive oil glows golden. It reminds me why cooking is such a sensory pleasure.
Instructions
1. Activate the yeast
In a mixing bowl, combine warm water, yeast, and sugar. Let it sit for about 5 minutes until slightly foamy. This step always feels like waking the dough up — a quiet beginning before the real work starts.
2. Prepare the garlic
Heat olive oil in a small skillet and gently cook the minced garlic until fragrant and just golden. Don’t rush this part. The aroma is worth savoring. Allow it to cool slightly before adding it to the dough mixture.
3. Mix the dough
Add flour, salt, herbs, and the garlic-oil mixture into the yeast bowl. Stir with a wooden spoon until a soft dough forms. It will look shaggy at first — that’s perfectly normal.
4. Knead with care
Turn the dough onto a floured surface and knead for about 8–10 minutes. Use the heel of your hand, push forward, fold, and repeat. I find this step calming, almost meditative. The dough gradually becomes smooth and elastic.
5. First rise
Place the dough back into a lightly oiled bowl, cover, and let rise for about an hour or until doubled in size. I usually set it near a sunny window or a warm corner of the kitchen.
6. Shape the loaf
Punch down gently and shape into an oval or round loaf. Place on parchment-lined baking sheet. Score the top lightly with a knife.
7. Second rise
Cover again and let it rest for another 30 minutes. This gives the bread structure and softness.
8. Bake
Preheat oven to 220°C (425°F). Bake for 20–25 minutes until the crust turns golden and sounds hollow when tapped.
9. Cool before slicing
Let it cool on a rack. I know it’s tempting, but slicing too early releases steam and affects texture. Waiting builds anticipation anyway.
Flavor and Texture Notes
When done right, the crust should feel crisp under your fingertips, while the inside stays tender and slightly chewy. The garlic should come through warmly, not aggressively. Olive oil enriches each bite, and herbs add a gentle earthiness.
One thing I’ve noticed while preparing the Wegmans Garlic Tuscan Bread Recipe repeatedly is how adaptable it is. You can add roasted peppers, sprinkle sea salt on top, or brush melted butter after baking for extra indulgence.
Serving Ideas
Fresh bread deserves thoughtful serving. Here are some of my favorites:
- Dipped in tomato soup
- Served with pasta dinners
- Paired with cheese boards
- Toasted for breakfast
- Made into hearty sandwiches
Sometimes I simply slice it thick, drizzle olive oil, and enjoy it quietly with tea. Those simple moments feel luxurious.
Tips from My Kitchen
- Don’t over-flour — soft dough makes better bread
- Roast garlic for a sweeter flavor
- Steam in the oven creates a crustier exterior
- Always let bread rest before slicing
I’ve learned these through trial, error, and many flour-covered countertops.
Storage and Freshness
Wrap cooled bread in cloth or store it in an airtight container. It keeps fresh for about two days at room temperature. You can freeze slices and reheat them later.
I often make extra because the Wegmans Garlic Tuscan Bread Recipe disappears quickly in my home — especially when guests visit.
Why I Love Making This Bread
As a female chef who’s spent years exploring food stories, I appreciate recipes that blend simplicity and soul. Baking this bread reminds me that cooking isn’t just technique — it’s emotion, memory, and generosity.
Each time I prepare the Wegmans Garlic Tuscan Bread Recipe, I feel connected to the process: kneading dough, inhaling garlic aromas, watching the crust brown. It’s grounded and creative at once.
Final Thoughts
Bread making teaches patience and rewards attention. This recipe captures rustic charm while staying approachable. You don’t need perfection — just curiosity and warmth in your cooking.
I hope this guide inspires you to bake, experiment, and share. The kitchen is where stories unfold, and something as simple as garlic bread can spark joy. If you try this recipe, trust your senses, adjust flavors, and most importantly, enjoy the journey from mixing bowl to table.
More Delicious Recipes:
Texadelphia Mustard Blend Recipe
Knaus Berry Farm Cinnamon Rolls Recipe
Wegmans Garlic Tuscan Bread Recipe
Equipment
- Large mixing bowl
- Measuring cups and spoons
- Wooden spoon or dough whisk
- Clean kitchen towel or plastic wrap
- Baking sheet or bread stone
- Parchment paper
- Sharp knife or bread lame
- Small skillet (for garlic preparation)
- Cooling rack
Ingredients
- 3 ½ cups all-purpose flour
- 1 ¼ cups warm water
- 2 teaspoons instant yeast
- 1 teaspoon sugar
- 1 ½ teaspoons salt
- 3 tablespoons olive oil
- 5 cloves garlic finely minced or lightly roasted
- 1 teaspoon dried Italian herbs optional but lovely
- Extra flour for dusting
- 3 ½ cups all-purpose flour
- 1 ¼ cups warm water
- 2 teaspoons instant yeast
- 1 teaspoon sugar
- 1 ½ teaspoons salt
- 3 tablespoons olive oil
- 5 cloves garlic finely minced or lightly roasted
- 1 teaspoon dried Italian herbs optional but lovely
- Extra flour for dusting
Instructions
Activate the yeast
- In a mixing bowl, combine warm water, yeast, and sugar. Let it sit for about 5 minutes until slightly foamy. This step always feels like waking the dough up — a quiet beginning before the real work starts.
Prepare the garlic
- Heat olive oil in a small skillet and gently cook the minced garlic until fragrant and just golden. Don’t rush this part. The aroma is worth savoring. Allow it to cool slightly before adding it to the dough mixture.
Mix the dough
- Add flour, salt, herbs, and the garlic-oil mixture into the yeast bowl. Stir with a wooden spoon until a soft dough forms. It will look shaggy at first — that’s perfectly normal.
Knead with care
- Turn the dough onto a floured surface and knead for about 8–10 minutes. Use the heel of your hand, push forward, fold, and repeat. I find this step calming, almost meditative. The dough gradually becomes smooth and elastic.
First rise
- Place the dough back into a lightly oiled bowl, cover, and let rise for about an hour or until doubled in size. I usually set it near a sunny window or a warm corner of the kitchen.
Shape the loaf
- Punch down gently and shape into an oval or round loaf. Place on parchment-lined baking sheet. Score the top lightly with a knife.
- Second rise
- Cover again and let it rest for another 30 minutes. This gives the bread structure and softness.
Bake
- Preheat oven to 220°C (425°F). Bake for 20–25 minutes until the crust turns golden and sounds hollow when tapped.
Cool before slicing
- Let it cool on a rack. I know it’s tempting, but slicing too early releases steam and affects texture. Waiting builds anticipation anyw

Sarah Miller is a home cook and recipe developer at Foodnesty. She loves creating simple, comforting, and family-friendly recipes using easy ingredients. Her goal is to help everyone cook delicious food with confidence.