
Intro
If you grew up watching Teletubbies (or raised kids who did), you already know the magic of bright, wobbly custard that made everyone strangely hungry. The Tubby Custard Recipe has lived rent-free in my brain for years. As a home cook and chef, I finally decided to recreate it in a way that feels playful but still tastes genuinely delicious.
This isn’t just a novelty dish. When made right, Tubby Custard is smooth, creamy, lightly sweet, and cozy in the way only homemade custard can be. I’ve tested, tweaked, and tasted this recipe more times than I’ll admit (chef’s privilege ), and I’m excited to walk you through it step by step.
Whether you’re making it for kids, for a themed party, or just for your inner child, this Tubby Custard Recipe is simple, fun, and honestly… kind of magical.
What Is the Tubby Custard Recipe?
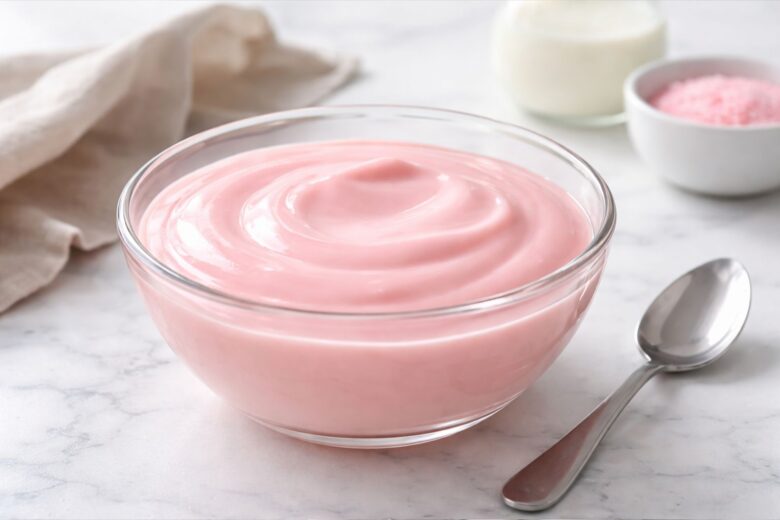
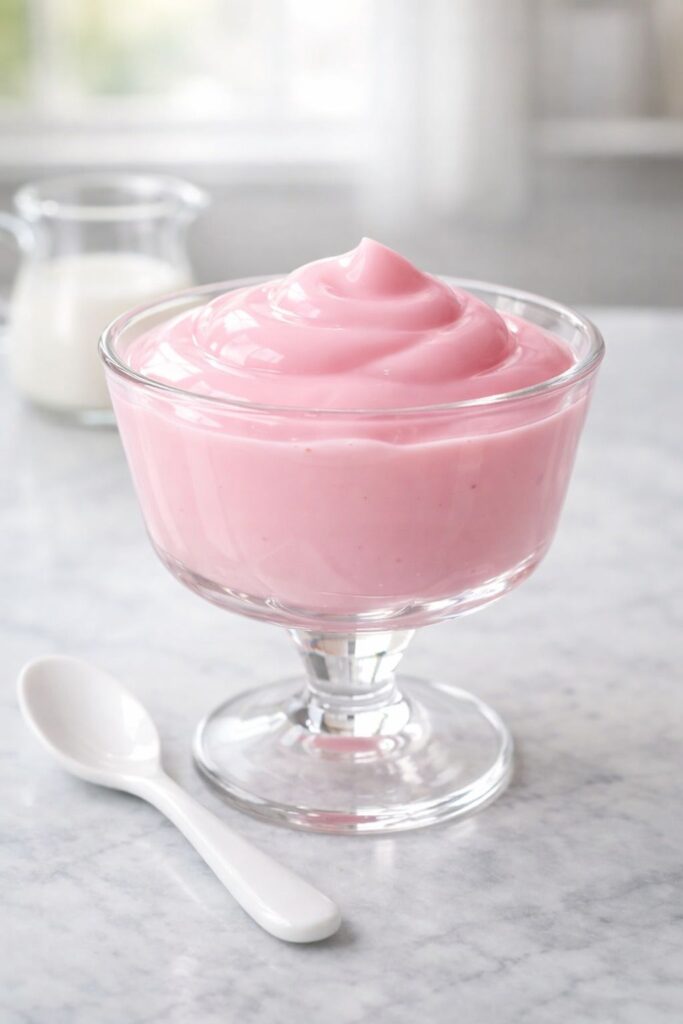
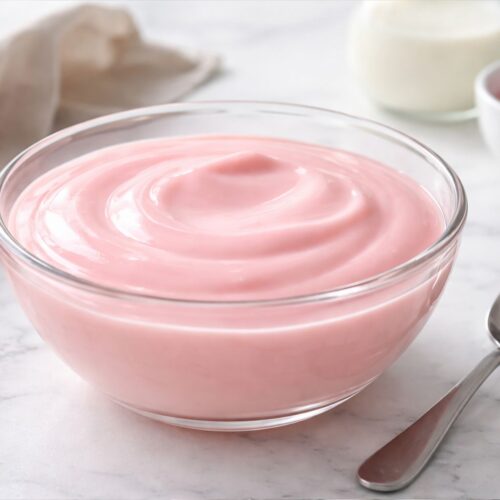
Tubby Custard is a thick, vanilla-style custard inspired by the famous pink custard from Teletubbies. On the show, it looked cartoonishly smooth and glossy, with a gentle jiggle that made it unforgettable.
In real life, we turn that idea into something edible and enjoyable. Think of it as a cross between classic custard and pudding:
- Smooth and velvety
- Mildly sweet, not overpowering
- Creamy with a soft wobble
- Comforting and playful
The real beauty of this recipe is that it’s made with everyday ingredients—milk, sugar, cornstarch, vanilla—yet feels special because of the texture and presentation.
As a female chef who loves cooking with heart, I see this recipe as a reminder that food doesn’t always need to be fancy. Sometimes, it just needs to be fun.
Equipment List
You don’t need anything complicated here. Simple tools, just the way I like it.
- Medium saucepan (heavy-bottomed works best)
- Whisk
- Silicone spatula or wooden spoon
- Measuring cups and spoons
- Mixing bowl
- Fine mesh sieve (optional, but great for extra smooth custard)
- Serving bowls or cups
That’s it. No mixer, no blender, no stress.
Ingredients (With Quantities)
Here’s what you’ll need for this homemade Tubby Custard Recipe. These quantities serve about 4–6 people, depending on portion size.
- 2½ cups whole milk
- ⅓ cup granulated sugar
- 3 tablespoons cornstarch
- 1 large egg yolk
- 1 tablespoon unsalted butter
- 1½ teaspoons vanilla extract
- 2–3 drops pink food coloring (optional, for the classic look)
- Pinch of salt
Optional Add-Ins
- 2 tablespoons heavy cream (for extra richness)
- A tiny drop of strawberry essence (very subtle, optional)
Instructions
Take a breath. Custard sounds fancy, but I promise this is friendly, forgiving cooking.
Step 1: Mix the Dry Ingredients
In a mixing bowl, whisk together the sugar, cornstarch, and salt. This helps prevent lumps later. I never skip this step—it makes all the difference.
Step 2: Add Milk Slowly
Pour in about ½ cup of the milk and whisk until smooth. Once the mixture looks creamy and lump-free, whisk in the egg yolk.
Step 3: Heat the Milk
In your saucepan, heat the remaining milk over medium heat. You want it warm, not boiling. Think gentle steam, not bubbles.
Step 4: Combine and Cook
Slowly pour the cornstarch mixture into the warm milk, whisking constantly. Keep whisking as it heats. After 3–5 minutes, you’ll feel it thicken. This part is oddly satisfying.
Step 5: Finish the Custard
Once thick, remove from heat. Stir in butter and vanilla extract. Add food coloring if using, just a drop at a time.
Step 6: Strain (Optional)
If you want ultra-smooth custard, pass it through a sieve. I do this when serving guests, but skip it when it’s just family.
Step 7: Chill or Serve Warm
You can serve Tubby Custard warm or chilled. Cover with plastic wrap, touching the surface to avoid skin forming.
What Tubby Custard Tastes Like
Let’s talk flavor, because this is where people are surprised.
The Tubby Custard Recipe isn’t overly sweet. It’s gentle, creamy, and comforting. The vanilla comes through softly, and the texture is silky with just enough wobble to feel playful.
If classic custard feels “grown-up,” this feels like its fun cousin—lighter, smoother, and more nostalgic.
Why This Recipe Works
As a chef, I care deeply about why recipes succeed.
- Cornstarch + egg yolk gives structure without heaviness
- While milk keeps it light but creamy
- Butter at the end adds silkiness
- Low heat prevents curdling
It’s simple food science, but it works beautifully.
Tips From My Kitchen
Here are my personal notes, straight from experience:
- Always whisk while heating. Custard waits for no one.
- Don’t rush the thickening. Medium heat is your friend.
- If it gets too thick, whisk in a splash of warm milk.
- For kids, go lighter on sugar—they love it just as much.
How to Get the Perfect Pink Color
The classic Tubby Custard is pink, but subtle is key.
- Use gel or liquid food coloring sparingly
- Start with 1 drop, then add more
- Stir fully before judging the color
Remember: pale pink looks more appetizing than neon.
Serving Ideas
This Tubby Custard Recipe is adorable on its own, but here are some fun ways to serve it:
- In clear cups so the color shines
- With whipped cream on top
- Sprinkled with rainbow sugar
- Alongside fresh strawberries
- As a dessert bar item for kids’ parties
I’ve even poured it into silicone molds for cute shapes. Total crowd-pleaser.
Make It Ahead
Good news: Tubby Custard is a great make-ahead dessert.
- Keeps in the fridge for up to 3 days
- Store in airtight containers
- Stir gently before serving if needed
The flavor actually settles and improves after chilling.
Variations You’ll Love
Once you master the basics, you can play.
Chocolate Tubby Custard
Add 2 tablespoons of cocoa powder to the sugar.
Strawberry Custard
Stir in 2 tablespoons of strawberry puree at the end.
Dairy-Free Version
Use full-fat coconut milk and plant butter. The texture is slightly different but still lovely.
Is Tubby Custard Safe for Kids?
Absolutely. This recipe is cooked fully, uses simple ingredients, and contains no raw eggs. It’s gentle on little tummies and easy to digest.
As a woman who cooks for family and friends, safety always comes first in my kitchen.
Common Mistakes (And How to Fix Them)
Too thick?
Whisk in warm milk a little at a time.
Lumpy?
Strain it. No shame, it happens.
Too sweet?
Balance with a pinch more salt.
Cooking is flexible—don’t panic.
Why I Love Making This Recipe
This Tubby Custard Recipe reminds me why I fell in love with cooking in the first place. It’s joyful. It’s simple. It makes people smile.
As a female chef, I believe food should feel welcoming, not intimidating. This custard does exactly that. It invites you in, no matter your skill level.
Nutritional Notes (Approximate)
Per serving:
- Calories: ~180
- Fat: Moderate
- Sugar: Balanced
- Protein: Small amount
It’s dessert, yes—but a gentle one.
Final Thoughts
If you’ve been looking for a fun, nostalgic, and genuinely tasty dessert, this Tubby Custard Recipe is it. It’s easy enough for beginners, satisfying for experienced cooks, and endlessly adaptable.
Make it once, and I promise—it’ll become one of those recipes you keep coming back to, especially on days when you need something comforting and cheerful.
From my kitchen to yours,
More Delicious Recipes :
Dave’s Hot Chicken Sauce Recipe
Texadelphia Mustard Blend Recipe:
Bahama Breeze Beef Empanadas Recipe
Knaus Berry Farm Cinnamon Rolls Recipe
Tubby Custard Recipe
Equipment
- Medium saucepan (heavy-bottomed works best)
- Whisk
- Silicone spatula or wooden spoon
- Measuring cups and spoons
- Mixing bowl
- Fine mesh sieve (optional, but great for extra smooth custard)
- Serving bowls or cups
Ingredients
- 2½ cups whole milk
- ⅓ cup granulated sugar
- 3 tablespoons cornstarch
- 1 large egg yolk
- 1 tablespoon unsalted butter
- 1½ teaspoons vanilla extract
- 2 –3 drops pink food coloring optional, for the classic look
- Pinch of salt
Optional Add-Ins
- 2 tablespoons heavy cream for extra richness
- A tiny drop of strawberry essence very subtle, optional
Instructions
Step 1: Mix the Dry Ingredients
- In a mixing bowl, whisk together the sugar, cornstarch, and salt. This helps prevent lumps later. I never skip this step—it makes all the difference.
Step 2: Add Milk Slowly
- Pour in about ½ cup of the milk and whisk until smooth. Once the mixture looks creamy and lump-free, whisk in the egg yolk.
Step 3: Heat the Milk
- In your saucepan, heat the remaining milk over medium heat. You want it warm, not boiling. Think gentle steam, not bubbles.
Step 4: Combine and Cook
- Slowly pour the cornstarch mixture into the warm milk, whisking constantly. Keep whisking as it heats. After 3–5 minutes, you’ll feel it thicken. This part is oddly satisfying.
Step 5: Finish the Custard
- Once thick, remove from heat. Stir in butter and vanilla extract. Add food coloring if using, just a drop at a time.
Step 6: Strain (Optional)
- If you want ultra-smooth custard, pass it through a sieve. I do this when serving guests, but skip it when it’s just family.
Step 7: Chill or Serve Warm
- You can serve Tubby Custard warm or chilled. Cover with plastic wrap, touching the surface to avoid skin forming.

Sarah Miller is a home cook and recipe developer at Foodnesty. She loves creating simple, comforting, and family-friendly recipes using easy ingredients. Her goal is to help everyone cook delicious food with confidence.