
Intro
There is something magical about winter baking. The kitchen feels warmer, the air smells sweeter, and every little bite feels like comfort. As a female chef who has spent years experimenting in both restaurant kitchens and my cozy home space, I can honestly say that this Cranberry Bliss Bars Recipe is one of those desserts that instantly lifts the mood.
The first time I made these bars at home, I wasn’t trying to recreate anything fancy. I just wanted a soft, buttery blondie with a little sparkle from dried cranberries. But once the white chocolate drizzle set and I sliced into those creamy, tangy layers… oh my goodness. It became a family favorite overnight.
What I love most is how balanced these bars are. They are sweet but not too sweet. Creamy but not heavy. The dried cranberries add a gentle tartness that cuts through the richness of the cream cheese frosting. And that white chocolate on top? It brings everything together with a smooth, melt-in-your-mouth finish.
If you enjoy festive baking that feels special yet simple, you are going to fall in love with this recipe just like I did. Let me walk you through everything, step by step, the way I would if we were baking side by side in my kitchen.
What is the Cranberry Bliss Bars Recipe?
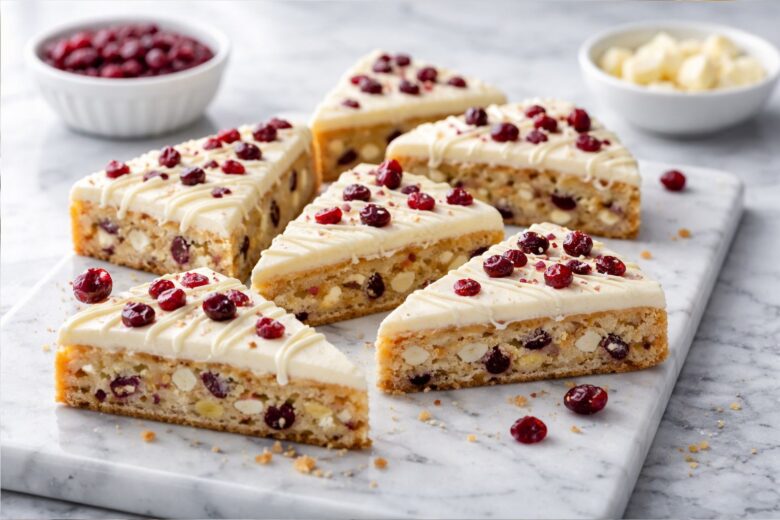
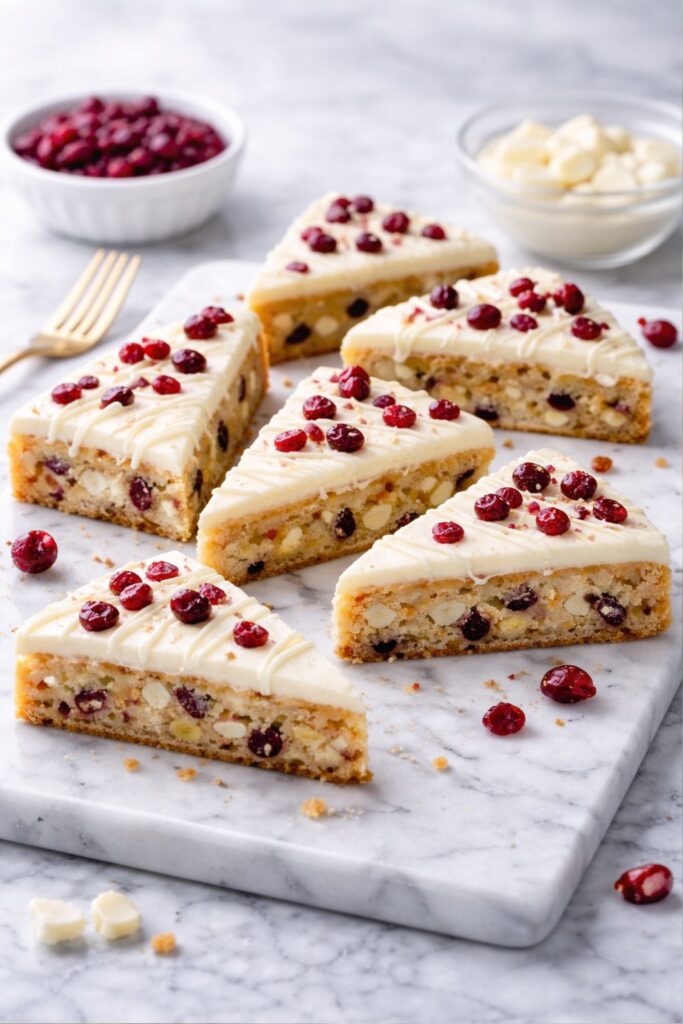
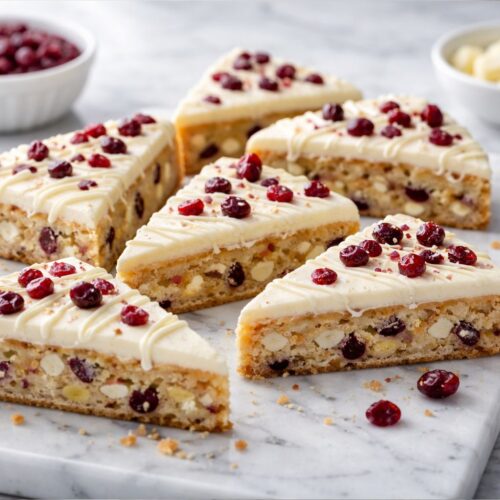
If you’ve never tried these before, imagine a soft, chewy blondie base flavored with vanilla and a hint of orange zest. Folded inside are sweet white chocolate chunks and chewy dried cranberries.
On top, there is a silky cream cheese frosting that is slightly tangy and lightly sweetened. Then comes the final touch: more dried cranberries and a delicate drizzle of melted white chocolate.
The flavor combination is beautiful:
- Sweetness from brown sugar and white chocolate
- Tanginess from cream cheese and cranberries
- Warm notes from vanilla
- Fresh brightness from orange zest
The texture is just as dreamy. The base is moist and slightly dense, like a soft cookie bar. The frosting is creamy and smooth. The cranberries add little chewy bursts in every bite.
As a chef, I always say texture matters just as much as flavor. And these bars truly deliver on both.
Equipment List
You don’t need fancy tools. That’s one reason I love this recipe so much. Here’s what you’ll need:
- 9×13-inch baking pan
- Parchment paper
- Mixing bowls (one large, one medium)
- Electric hand mixer or stand mixer
- Whisk
- Spatula
- Measuring cups and spoons
- Zester or fine grater (for orange zest)
- Knife for slicing
I always line my pan with parchment paper. It makes lifting and cutting the bars so much easier. Trust me, once you try this trick, you’ll never skip it again.
Ingredients (With Quantities)
For the Blondie Base
- 1 cup (226g) unsalted butter, melted
- 1 ½ cups (300g) light brown sugar
- 2 large eggs
- 1 teaspoon vanilla extract
- 1 tablespoon fresh orange zest
- 2 cups (250g) all-purpose flour
- 1 teaspoon baking powder
- ½ teaspoon salt
- ¾ cup (130g) dried cranberries, chopped
- ¾ cup (130g) white chocolate chunks
For the Cream Cheese Frosting
- 8 oz (226g) cream cheese, softened
- ½ cup (113g) unsalted butter, softened
- 2 cups (240g) powdered sugar
- ½ teaspoon vanilla extract
For the Topping
- ¼ cup dried cranberries, finely chopped
- ½ cup white chocolate, melted
I always recommend using good-quality white chocolate. It makes a big difference in flavor and melting texture.
Instructions
Step 1: Prepare the Pan
Preheat your oven to 350°F (175°C). Line a 9×13-inch baking pan with parchment paper, leaving some overhang on the sides.
Lightly grease the paper. This helps the bars release cleanly.
Step 2: Make the Blondie Batter
In a large bowl, whisk together the melted butter and brown sugar until smooth and glossy. The mixture should look thick and shiny.
Add the eggs one at a time, whisking well after each addition. Stir in the vanilla extract and fresh orange zest.
In another bowl, combine the flour, baking powder, and salt. Gradually add the dry ingredients to the wet mixture. Mix gently until just combined.
Now fold in the dried cranberries and white chocolate chunks. The batter will be thick. That’s exactly what you want.
Step 3: Bake
Spread the batter evenly into your prepared pan. Use a spatula to smooth the top.
Bake for 18–22 minutes. The edges should look lightly golden, and the center should be set but still soft.
Do not overbake. This is very important. Overbaking will make the bars dry instead of soft and chewy.
Let the base cool completely before frosting. I know it’s hard to wait, but patience pays off here.
Step 4: Make the Frosting
In a medium bowl, beat the softened cream cheese and butter until smooth and fluffy.
Add powdered sugar gradually, mixing on low speed at first to avoid a sugar cloud in your kitchen.
Stir in vanilla extract. Beat until creamy and spreadable.
Taste it. If you’re like me, you’ll sneak just a little spoonful. It’s irresistible.
Step 5: Frost and Decorate
Spread the cream cheese frosting evenly over the cooled bars.
Sprinkle chopped dried cranberries on top.
Drizzle melted white chocolate in thin lines across the surface. I use a spoon or a small piping bag for better control.
Let the chocolate set before slicing. You can refrigerate the pan for 20–30 minutes to speed this up.
How to Cut Perfect Triangles
Here’s a little chef tip. Traditionally, these bars are cut into triangles instead of squares.
- First, trim the edges for clean lines.
- Cut the pan into rectangles.
- Then slice each rectangle diagonally into two triangles.
Wipe your knife clean between cuts for neat slices.
Flavor Profile: What to Expect
The first bite is creamy from the frosting. Then you hit the soft blondie base. The cranberries bring a tart pop that balances the sweetness. The white chocolate melts gently on your tongue.
The orange zest gives a subtle brightness that makes everything taste fresher and lighter.
It’s sweet, tangy, buttery, creamy, and slightly chewy all at once.
Tips for the Best Results
- Use room temperature cream cheese and butter for smooth frosting.
- Do not overmix the batter after adding flour.
- Cool completely before frosting.
- Chill before cutting for cleaner slices.
Small details make a big difference.
Storage Tips
Store the bars in an airtight container in the refrigerator for up to 5 days.
Let them sit at room temperature for 15 minutes before serving. The texture becomes softer and more flavorful.
You can also freeze them (without the drizzle) for up to 2 months.
Variations You Can Try
As a chef, I love experimenting. Here are a few fun twists:
- Add chopped pecans for crunch
- Swap white chocolate with dark chocolate
- Add a tiny pinch of cinnamon
- Mix orange extract into frosting for a stronger citrus flavor
Each version gives a slightly different personality to the bars.
Why You’ll Love This Cranberry Bliss Bars Recipe
This dessert feels fancy, but it’s truly simple. It’s perfect for holidays, tea time, potlucks, or even just a cozy night at home.
The flavors feel festive without being overwhelming. The texture is rich yet balanced. And every time I serve these, people ask for the recipe.
That’s always the best compliment for any chef.
Final Thoughts
Baking is not just about ingredients. It’s about memories, warmth, and sharing something sweet with people you love.
This Cranberry Bliss Bars Recipe has become one of those comforting traditions in my kitchen. I hope it becomes one in yours, too.
If you try it, make it your own. Add your twist. Bake it with your kids. Share it with friends.
And most importantly, enjoy every single bite. 💛
More Delicious Recipes:
Chocolate Cake Mix Cookies Recipe
Street Corn Chicken Rice Bowl Recipe
Air Fryer Chicken Breast Recipe
Cranberry Bliss Bars Recipe
Equipment
- 9×13-inch baking pan
- Parchment paper
- Mixing bowls (one large, one medium)
- Electric hand mixer or stand mixer
- Whisk
- Spatula
- Measuring cups and spoons
- Zester or fine grater (for orange zest)
- Knife for slicing
Ingredients
For the Blondie Base
- 1 cup 226g unsalted butter, melted
- 1 ½ cups 300g light brown sugar
- 2 large eggs
- 1 teaspoon vanilla extract
- 1 tablespoon fresh orange zest
- 2 cups 250g all-purpose flour
- 1 teaspoon baking powder
- ½ teaspoon salt
- ¾ cup 130g dried cranberries, chopped
- ¾ cup 130g white chocolate chunks
For the Cream Cheese Frosting
- 8 oz 226g cream cheese, softened
- ½ cup 113g unsalted butter, softened
- 2 cups 240g powdered sugar
- ½ teaspoon vanilla extract
For the Topping
- ¼ cup dried cranberries finely chopped
- ½ cup white chocolate melted
Instructions
Step 1: Prepare the Pan
- Preheat your oven to 350°F (175°C). Line a 9×13-inch baking pan with parchment paper, leaving some overhang on the sides.
- Lightly grease the paper. This helps the bars release cleanly.
Step 2: Make the Blondie Batter
- In a large bowl, whisk together the melted butter and brown sugar until smooth and glossy. The mixture should look thick and shiny.
- Add the eggs one at a time, whisking well after each addition. Stir in the vanilla extract and fresh orange zest.
- In another bowl, combine the flour, baking powder, and salt. Gradually add the dry ingredients into the wet mixture. Mix gently until just combined.
- Now fold in the dried cranberries and white chocolate chunks. The batter will be thick. That’s exactly what you want.
Step 3: Bake
- Spread the batter evenly into your prepared pan. Use a spatula to smooth the top.
- Bake for 18–22 minutes. The edges should look lightly golden, and the center should be set but still soft.
- Do not overbake. This is very important. Overbaking will make the bars dry instead of soft and chewy.
- Let the base cool completely before frosting. I know it’s hard to wait, but patience pays off here.
Step 4: Make the Frosting
- In a medium bowl, beat the softened cream cheese and butter until smooth and fluffy.
- Add powdered sugar gradually, mixing on low speed at first to avoid a sugar cloud in your kitchen.
- Stir in vanilla extract. Beat until creamy and spreadable.
- Taste it. If you’re like me, you’ll sneak just a little spoonful. It’s irresistible.
Step 5: Frost and Decorate
- Spread the cream cheese frosting evenly over the cooled bars.
- Sprinkle chopped dried cranberries on top.
- Drizzle melted white chocolate in thin lines across the surface. I use a spoon or a small piping bag for better control.
- Let the chocolate set before slicing. You can refrigerate the pan for 20–30 minutes to speed this up.

Sarah Miller is a home cook and recipe developer at Foodnesty. She loves creating simple, comforting, and family-friendly recipes using easy ingredients. Her goal is to help everyone cook delicious food with confidence.